BigCommerce
WeGetFinancing offers two BigCommerce integrations: a checkout payment method and the PPE widget (estimates shown in the storefront before checkout).
Checkout Payment Method
Section titled “Checkout Payment Method”The checkout plugin redirects customers to the WeGetFinancing financing flow when they select WeGetFinancing as their payment method.
How It Works
Section titled “How It Works”A JavaScript snippet is added to the checkout page that detects when the WeGetFinancing payment method name is selected and redirects to the WeGetFinancing loan form. Because this relies on name detection, avoid renaming the payment method.
Installation
Section titled “Installation”-
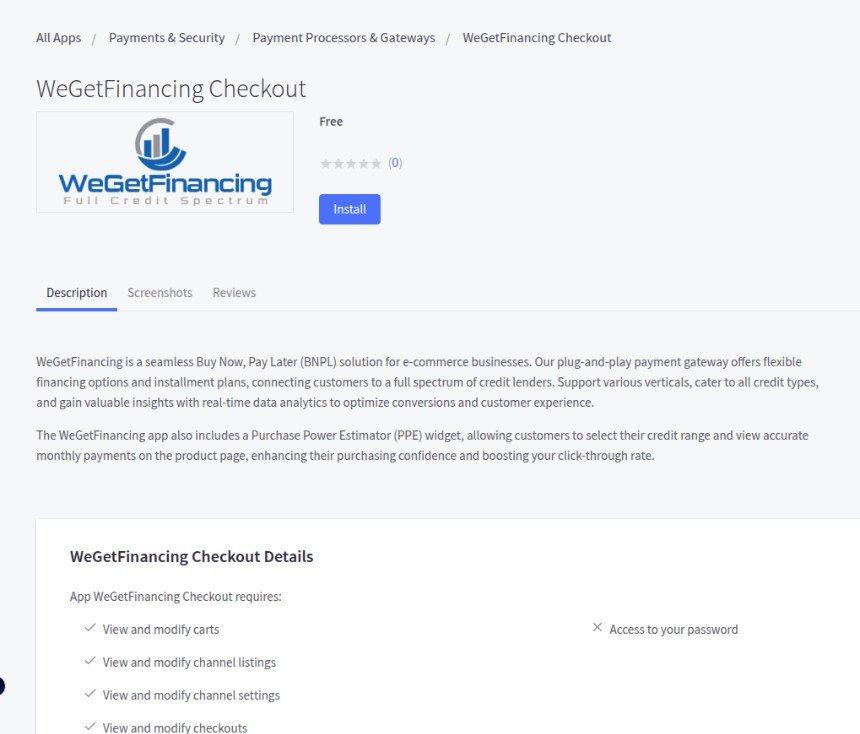
Install from the App Marketplace
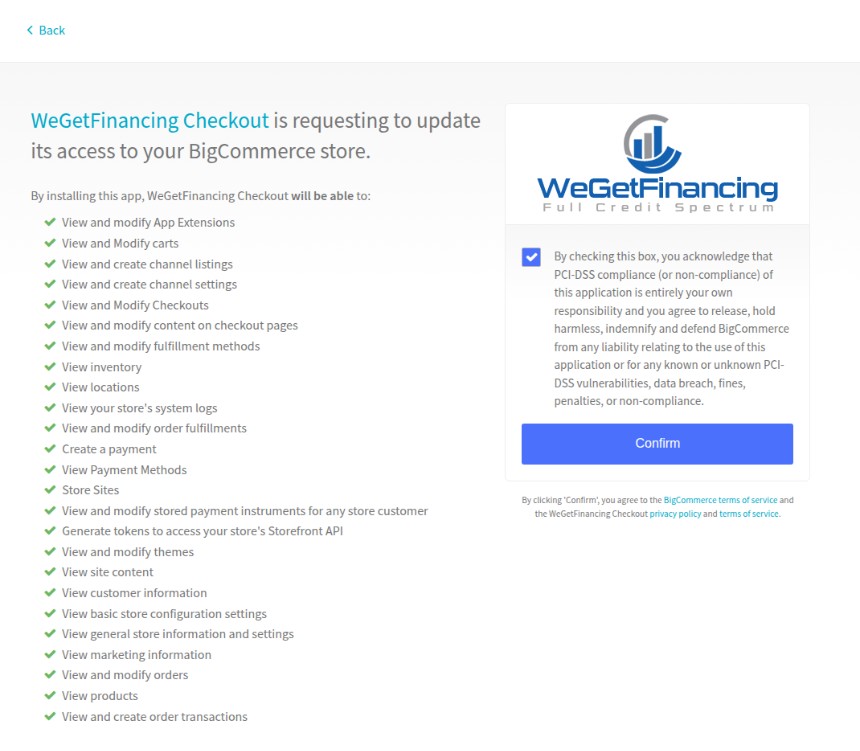
Go to Apps → App Marketplace and search for WeGetFinancing Checkout Plugin. Select it and click Install, then confirm the requested access.
-
Create a payment method
Navigate to Store Settings → Payments → Offline Payment Methods → Bank Deposit.
- Rename it to WeGetFinancing (the script detects this exact name).
- Enable it for USA only.
- Replace the thank-you message with:
Thank You For Your Purchase with WeGetFinancing(the word WeGetFinancing must appear in the message).
-
Add the integration script
Go to Advanced Settings → Web Analytics and paste the following into the script field:
<script src="https://cdn.wegetfinancing.com/libs/1.0/getfinancing-plugin.js"></script><script>var merchant_id = 0; // Replace with your numeric merchant IDvar environment = "production"; // "staging" for the sandbox environmentvar pluginOptions = {disableFaqLink: false // set true to hide the WGF logo in the cart page};(new getFinancingPlugin.BigCommercePlugin(merchant_id, environment, {}, pluginOptions)).start();</script> -
Save and test with a sample purchase.
At checkout, WeGetFinancing appears as a payment method. Selecting it redirects the customer to the WeGetFinancing financing flow; after completion they are returned to the store’s confirmation page.
PPE Widget (Purchase Power Estimator)
Section titled “PPE Widget (Purchase Power Estimator)”The PPE widget is installed through the BigCommerce theme editor using the WeGetFinancing Checkout Plugin. A short video walkthrough is available on YouTube.
Installation
Section titled “Installation”- Go to Storefront → Themes → Customize (on your active theme).
- In the left panel, scroll to the CUSTOM section.
- Drag the WGF PPE widget to a droppable area of your template.
- In the left configuration panel that appears, set:
- Token — your access token from the partner backoffice (Integration → Conversion Boosters).
- Minimum amount — widget is hidden on products below this price.
- Any additional display options (branding, custom text, hover).
- Accept or adjust the default configuration and click Save.
For PPE widget configuration options, see the PPE Widget reference.