Shopping Cart plugins & guides
Are you one of the users of a ready to use Shopping Cart solutions? We want to make it easy for you!
Most of our modules are in our GitHub repository and they are open source.
Check out this modules and step by step instructions to integrate WeGetFinancing. Also remember you can always use our Simple Integration , which can be added virtually to any Shopping Cart software or HTML page.
Managed shopping cart Integration guides
3dcart Integration Guide

In this guide we will be integrating WeGetFinancing as an alternate payment method for 3dcart. This means that besides your current payment methods you will have WeGetFinancing as a payment method in the checkout page.
The way this process works is by adding a Javascript to the checkout page, that redirects to our form when the payment method name is detected. Make sure to test it, since heavily modified templates or newer versions of 3dcarts could break this process.
For doubts do not hesitate to contact support@wegetfinancing.com
Step by Step
Login to your 3dCart Back-End/Admin Area.
Navigate to Content – Header & Footer – Global Footer
Click the code revealer button
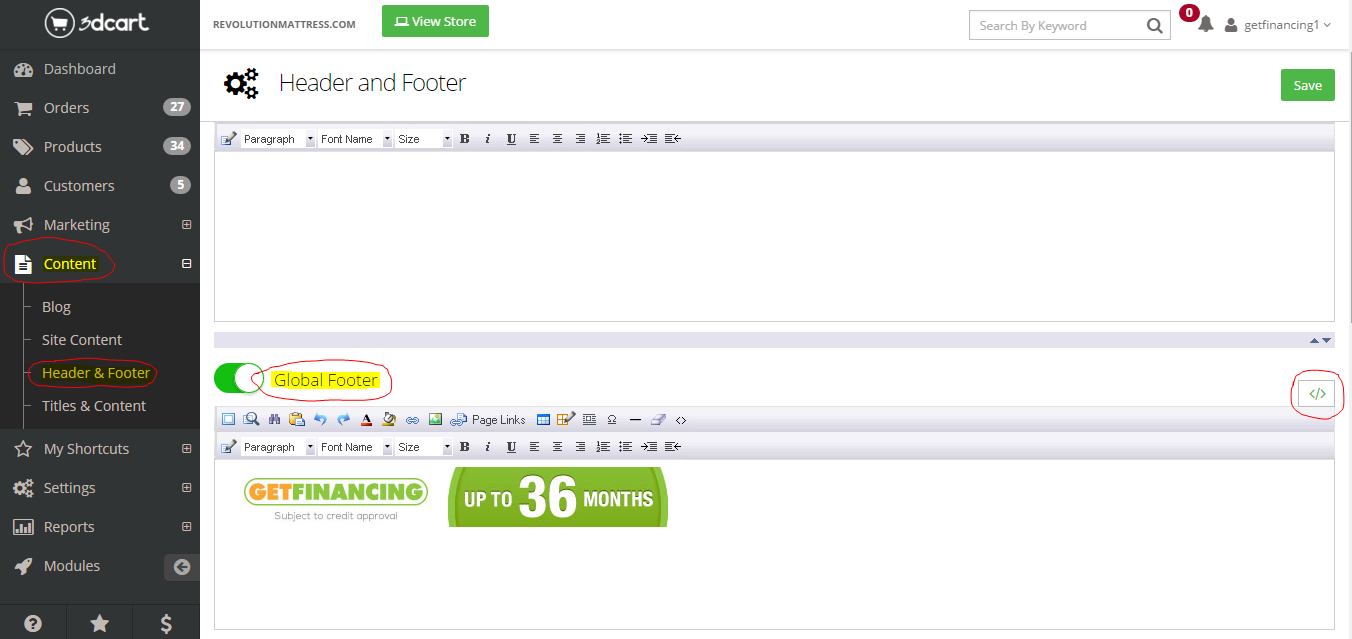
Insert the following code into the Global Footer, and save it:
Following you will find the Javascript to paste, replacing ##YOUR_MERCHANT_ID## for your merchant ID:
<script src="https://cdn.wegetfinancing.com/libs/1.0/wegetfinancing-plugin.js"></script>
<script type="text/javascript">

    /* Insert Here your merchant ID */
    var merchant_id = 0;

    /* Insert Here the Environment */
    var environment = "production"  // "staging" otherwise

    /* PluginOptions */
    var pluginOptions = {
      disableFaqLink: false //if true, disables the WeGetFinancing logo placement into the cart page
    }

    (new getFinancingPlugin.ThreeDCartPlugin(merchant_id, environment, {}, pluginOptions)).start();

</script>
Now navigate to Settings - Payment – Method of Payment – Click on ‘Select Payment’
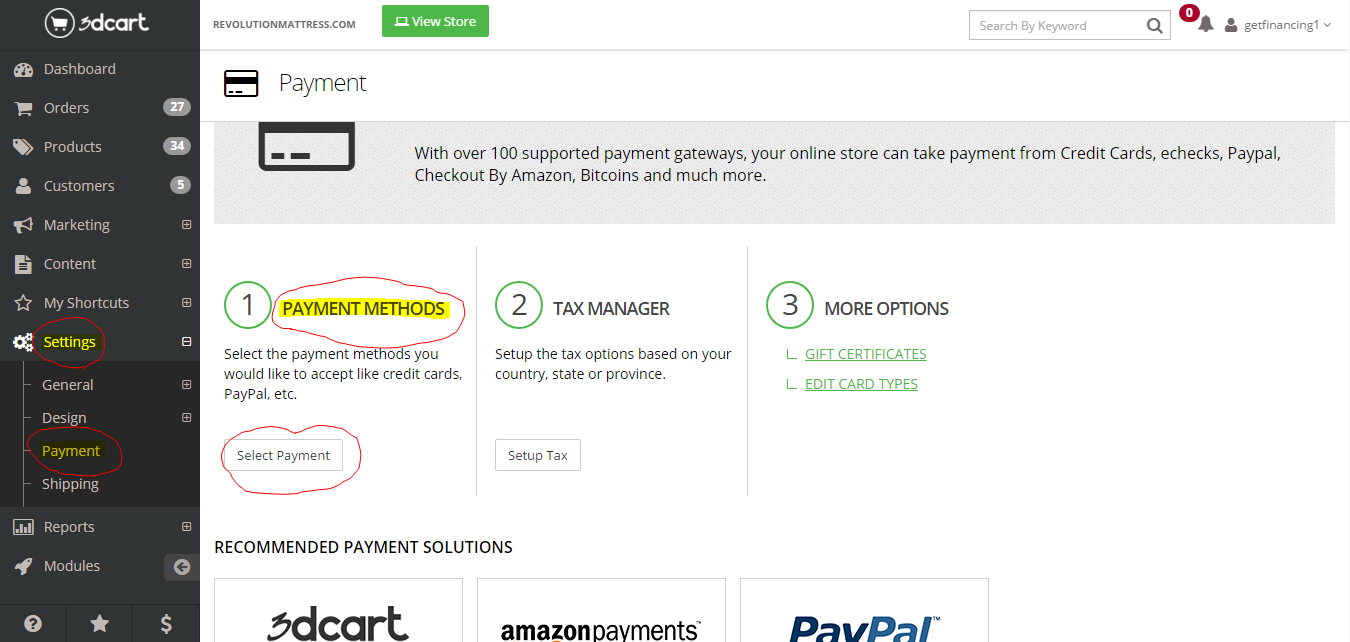
Click “Add New” in payment option window.

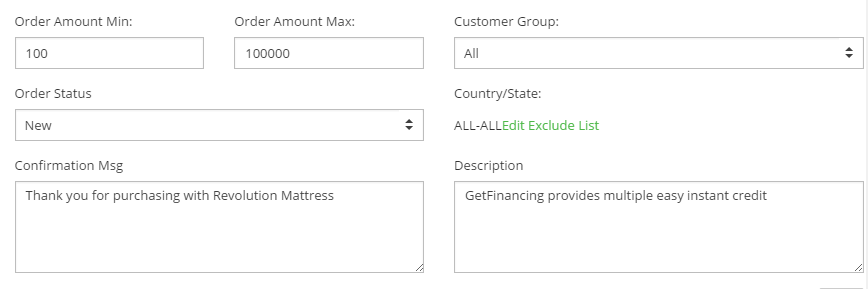
Title this “WeGetFinancing - Purchase Finance Gateway” and make sure that the following information is reflected in the settings of it.
After this is complete, go into your Checkout page (normally labeled: “checkout_one.asp”) by navigating into the Settings – Design – Themes & Styles and clicking on the “Edit HTML” button.
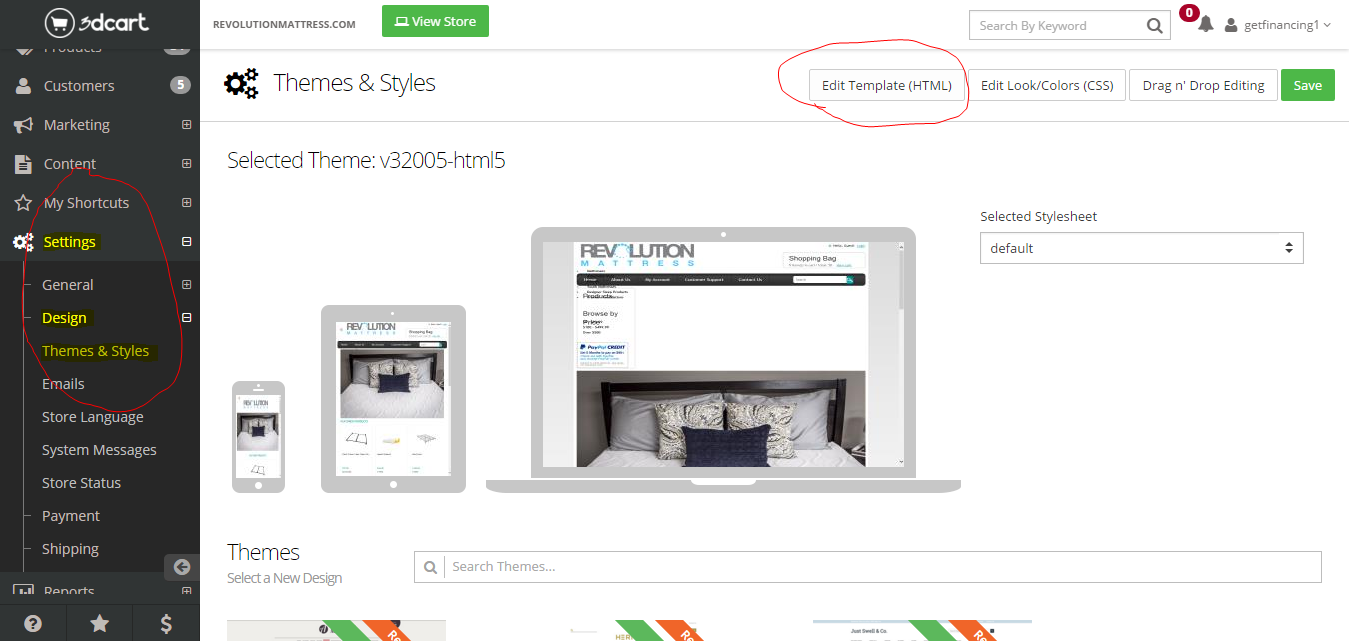
Then click on the drop down menu labeled “Go to folder” and click on “templates/common-html5”
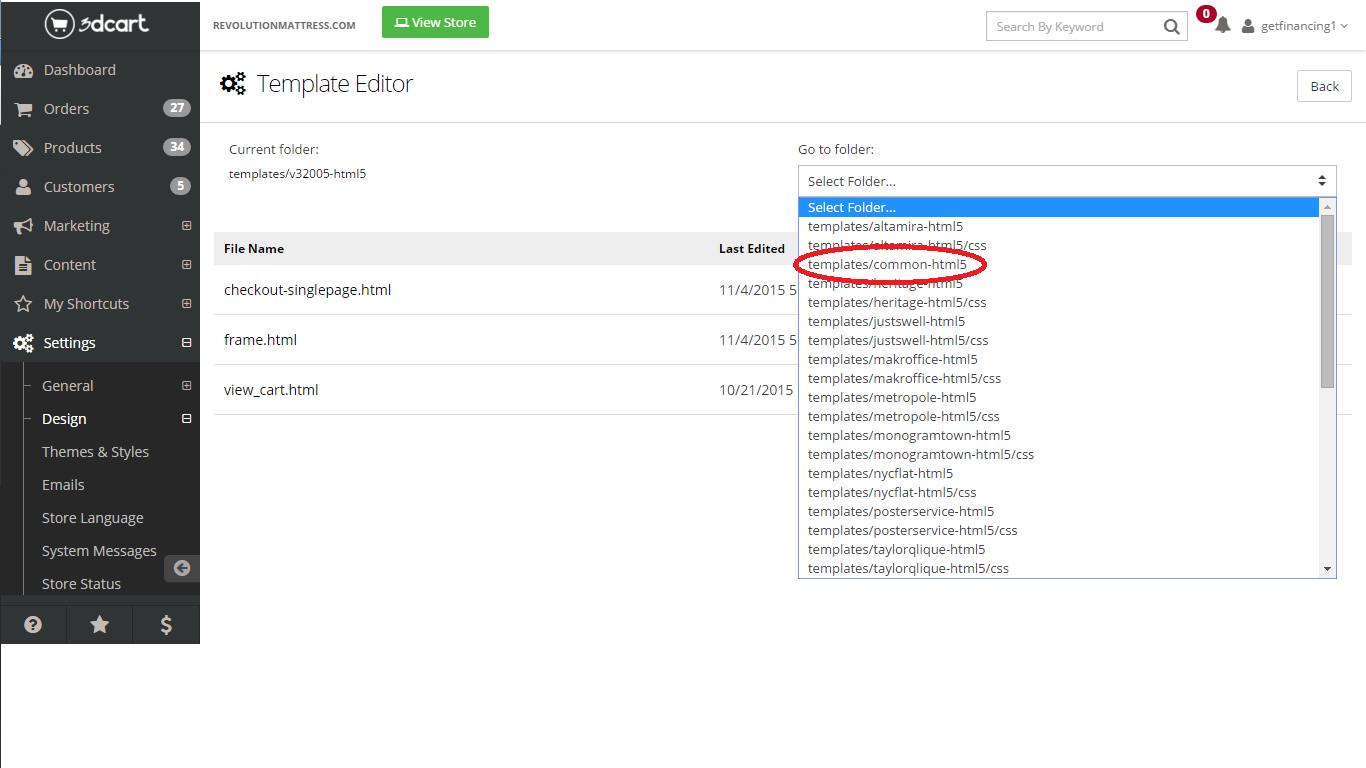
Click on the file named “checkout-step1.html”
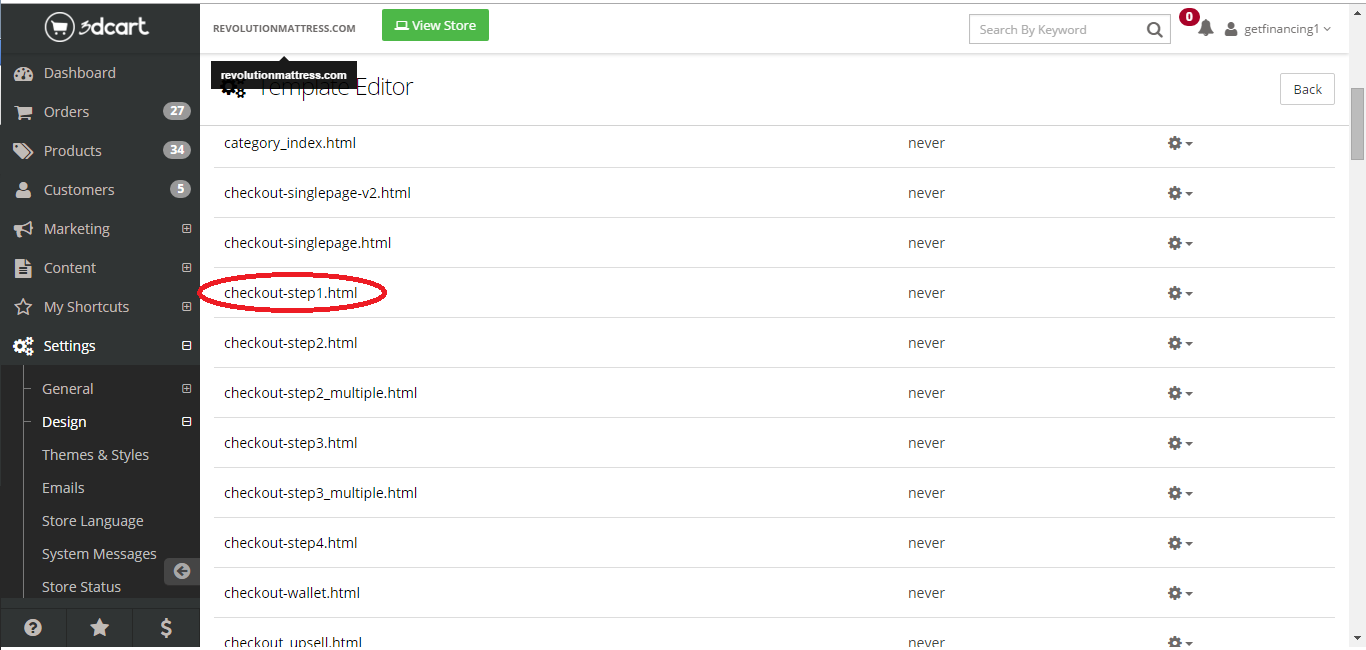
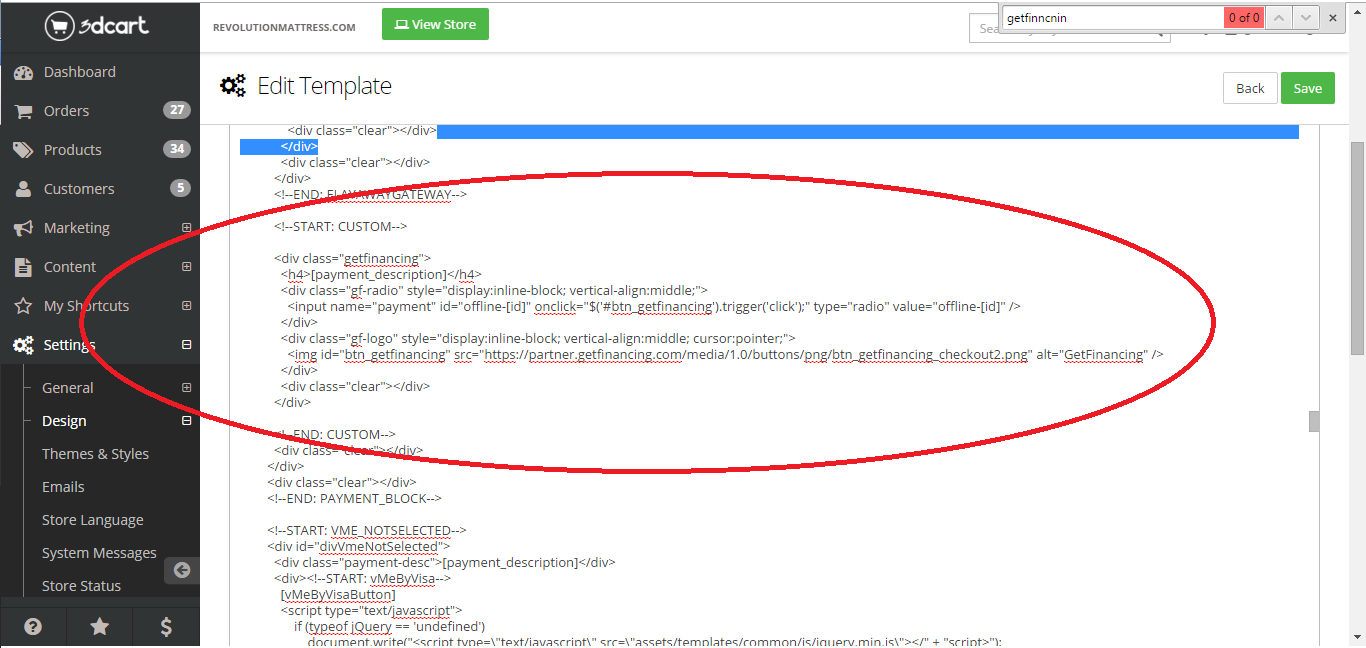
Copy this code to the payment button section of the HTML wherever you want the button to take residency, and save it:
<!--START: CUSTOM-->

  <div class="wegetfinancing">
    <h4>[payment_description]</h4>
    <div class="gf-radio" style="display:inline-block; vertical-align:middle;">
      <input name="payment" id="offline-[id]" onclick="$('#btn_wegetfinancing').trigger('click');" type="radio" value="offline-[id]" />
    </div>
    <div class="gf-logo" style="display:inline-block; vertical-align:middle; cursor:pointer;">
      <img id="btn_wegetfinancing" src="https://partner.wegetfinancing.com/media/1.0/buttons/png/btn_wegetfinancing_checkout2.png" alt="WeGetFinancing" />
    </div>
    <div class="clear"></div>
  </div>

  <!--END: CUSTOM-->
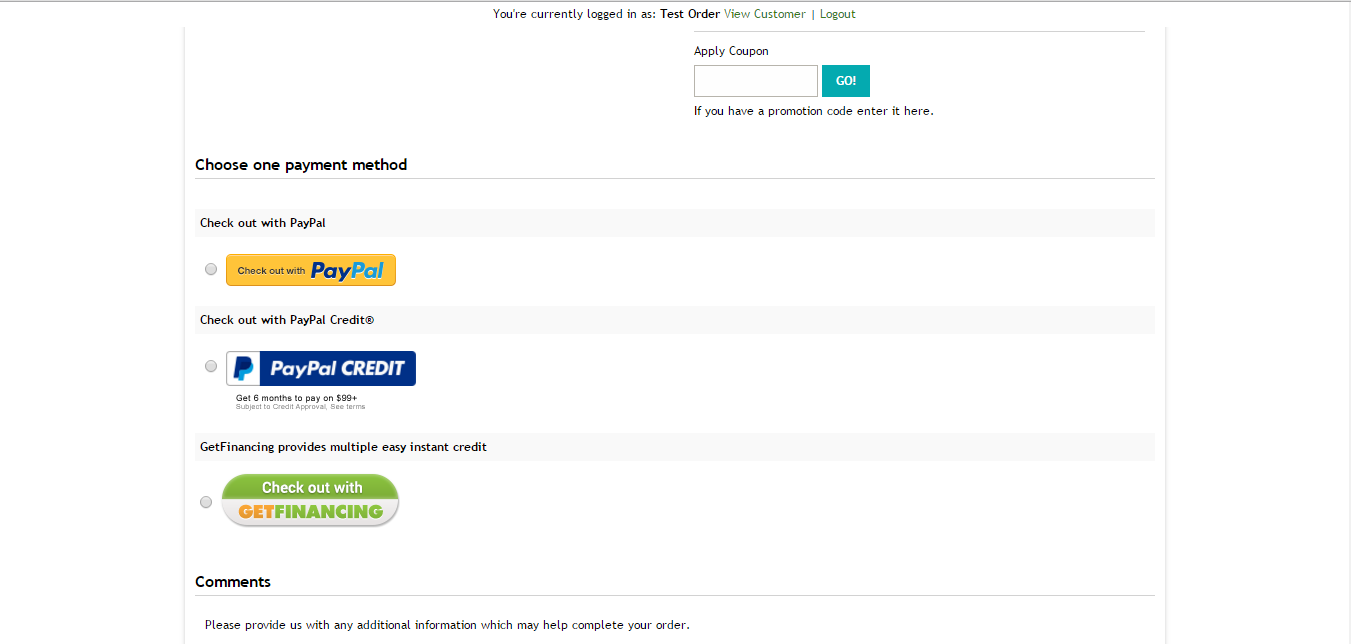
And the checkout page should something similar to this
BigCommerce Integration Guide

In this guide we will be integrating WeGetFinancing as an alternate payment method for BigCommerce with the newer BigCommerce versions (post 2017). This means that besides your current payment methods you will have WeGetFinancing as a payment method in the checkout page.
The way this process works is by adding a Javascript to the checkout page, that redirects to our form when the payment method name is detected. Make sure to test it, since heavily modified templates or newer versions of BigCommerce could break this process.
This guide is different than the previous because it applies to new BigCommerce installations (post 2017).
For doubts do not hesitate to contact integrations@wegetfinancing.com.
Step by Step
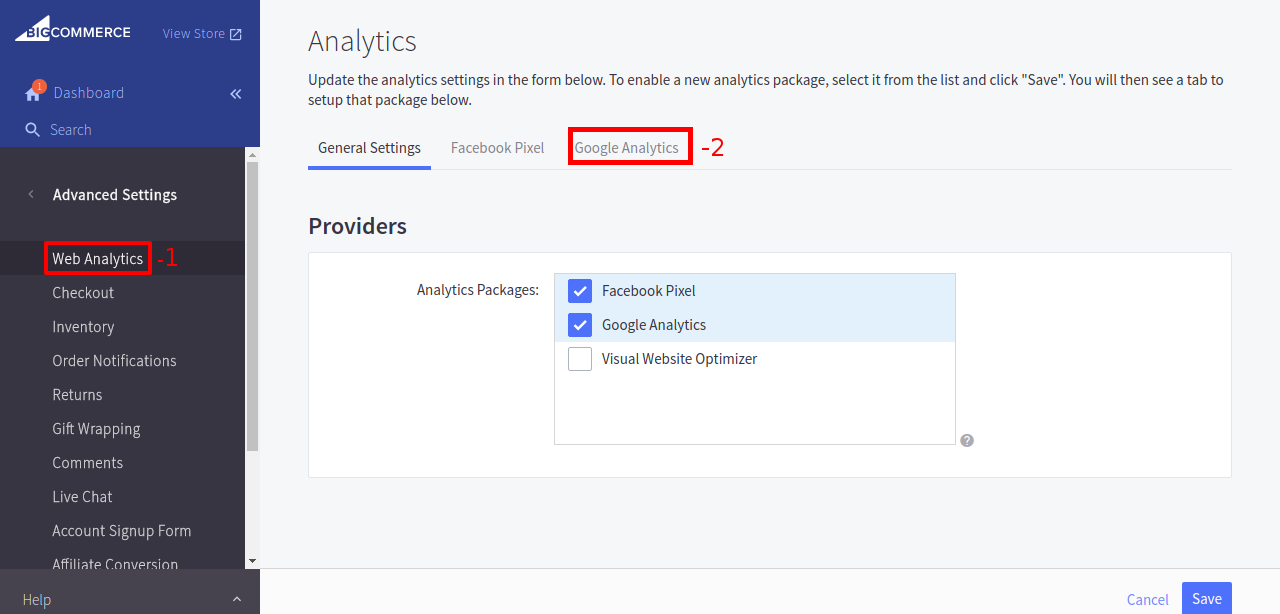
Login onto your BigCommerce Merchant Admin Account.
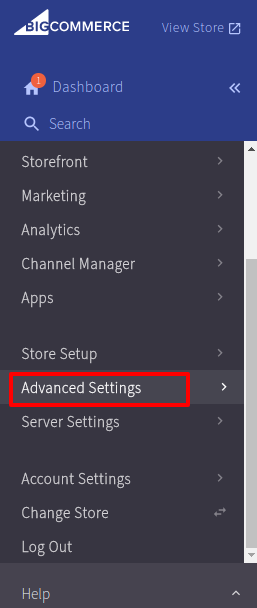
Navigate to: ** Store Settings / Payments**

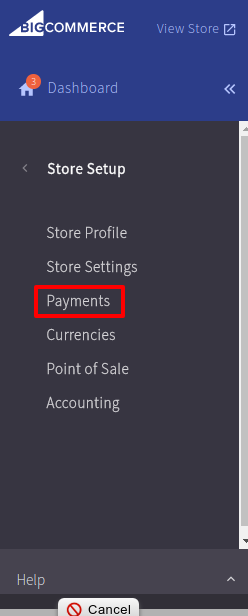
Select Offline Payment Methods and Setup Bank deposit
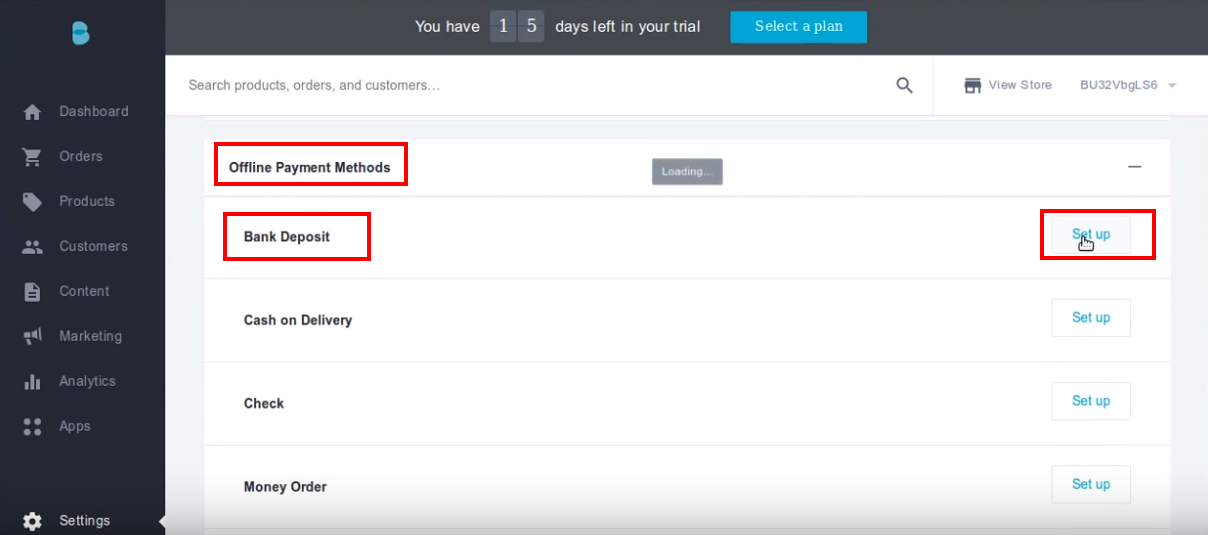
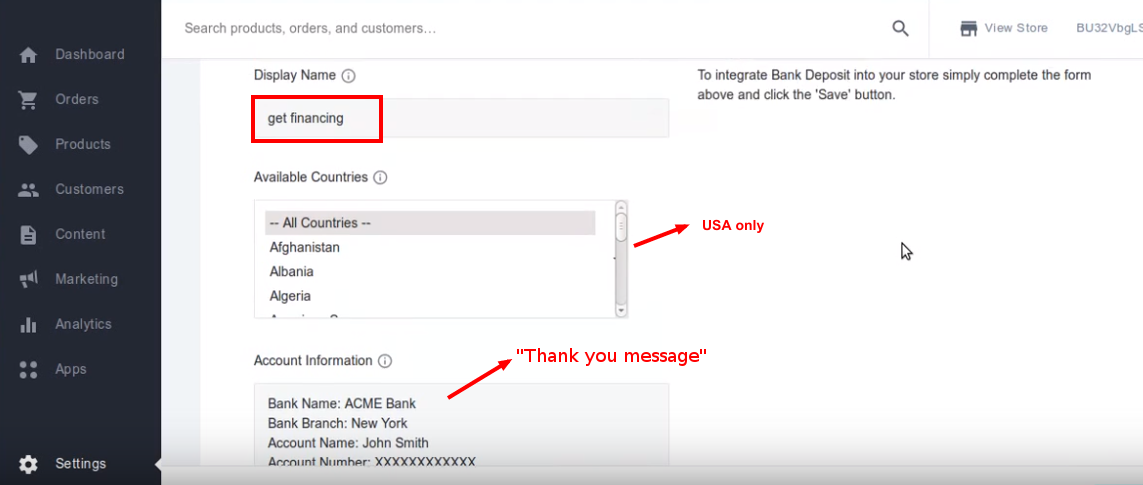
- Change the name from Bank Deposit to WeGetFinancing (If you are already using Bank Deposit, use a different offline method).
Also make sure that is only enabled for USA and to replace the text of the thank you page.
Name: “WeGetFinancing”
Replace “Thank you message” with “Thank You For Your Purchase with WeGetFinancing”, make sure you include the word WeGetFinancing in the text, this word is used in the code to redirect to the proper page.
Follow these steps
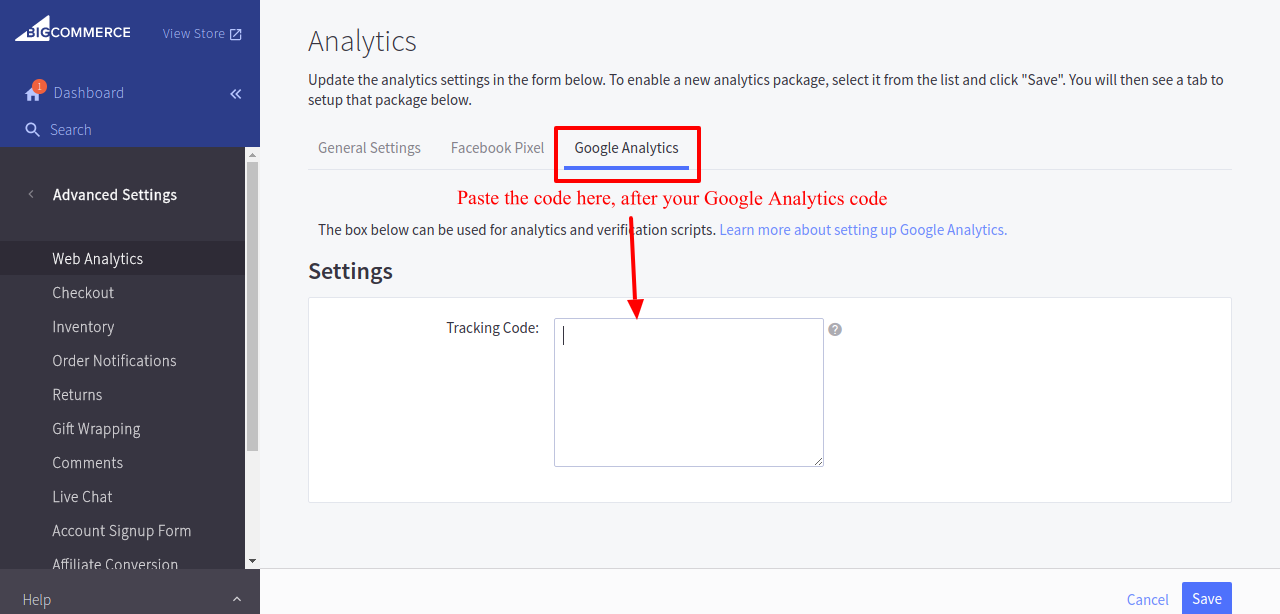
Following you will find the Javascript to paste:
<script src="https://cdn.wegetfinancing.com/libs/1.0/wegetfinancing-plugin.js"></script>
<script>

    /* Insert Here your merchant ID */
    var merchant_id = 0;

    /* Insert Here the Environment */
    var environment = "production"  // "staging" otherwise

    /* PluginOptions */
    var pluginOptions = {
    disableFaqLink: false //if true, disables the WeGetFinancing logo placement into the cart page
    }

    (new getFinancingPlugin.BigCommercePlugin(merchant_id, environment, {}, pluginOptions)).start();

</script>
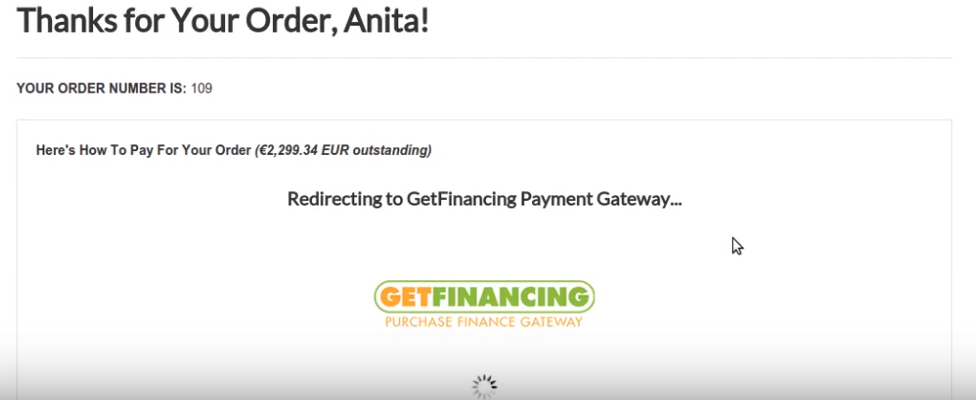
Finally save the changes and make sure to test it with a sample purchase.
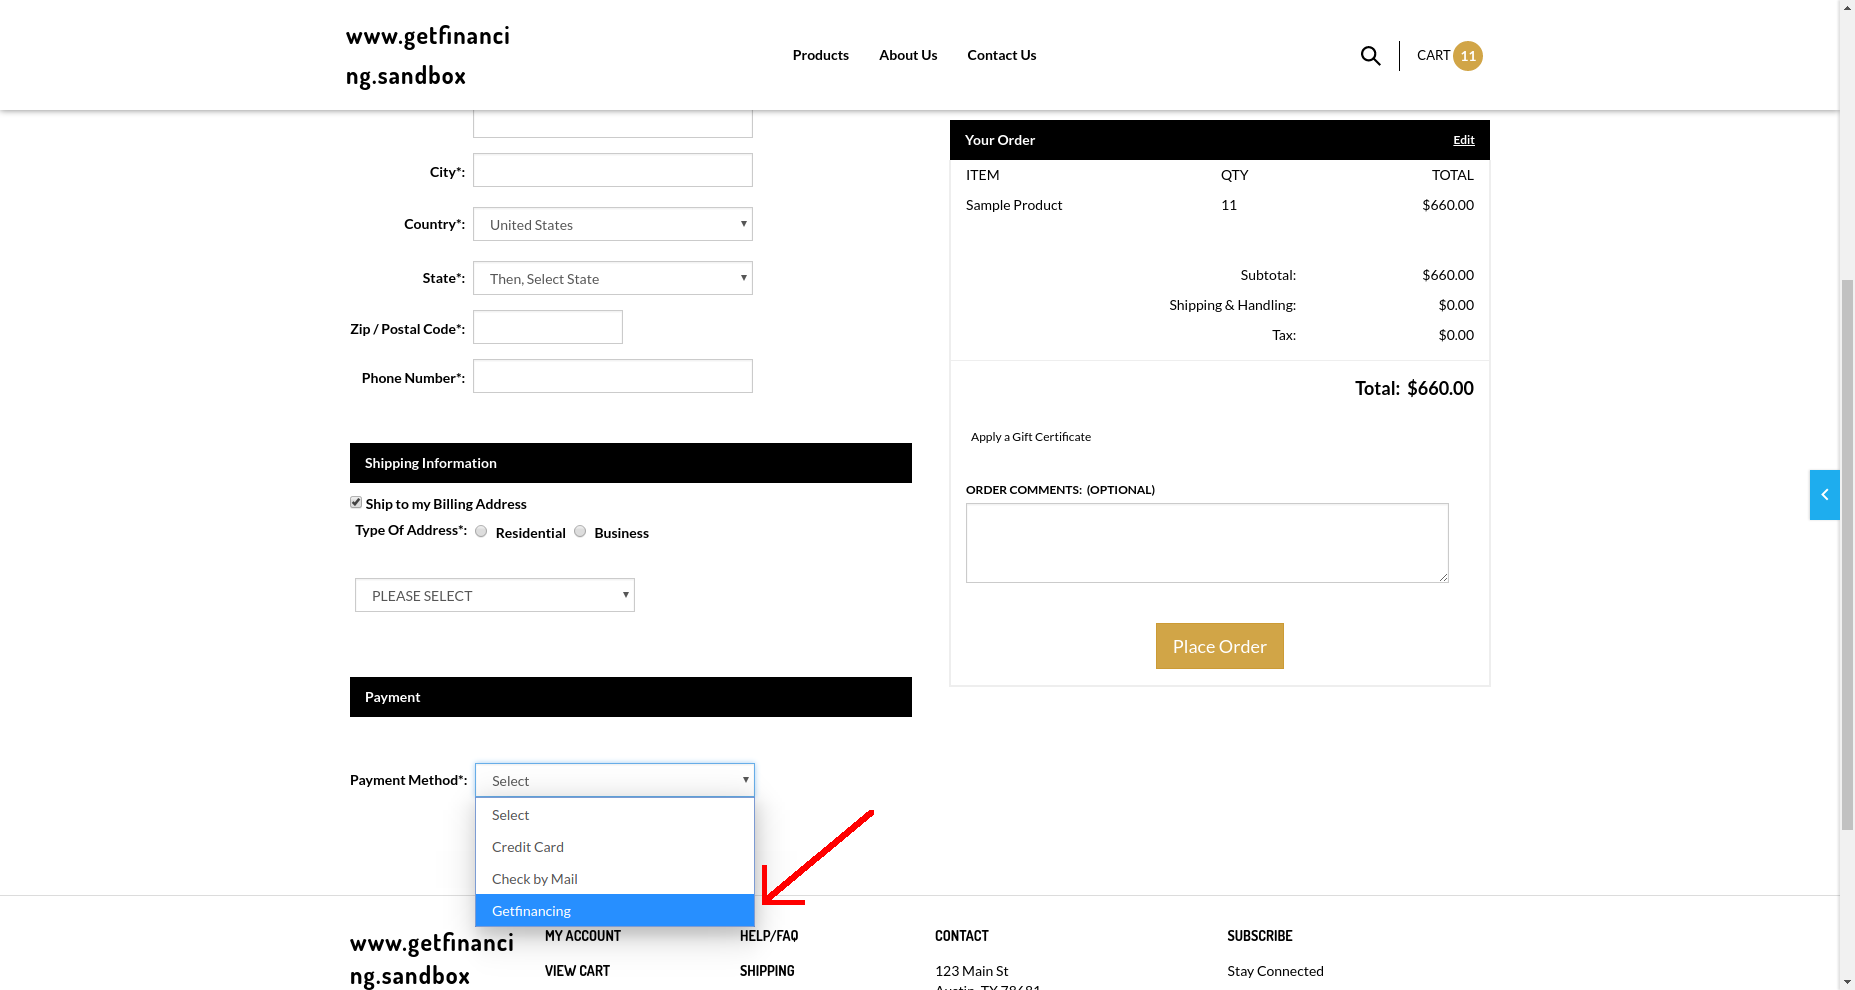
You will see WeGetFinancing as a payment method in the checkout screen.

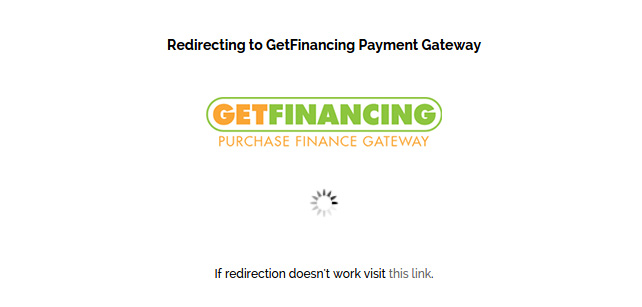
If everything goes correctly, you will be redirected to our checkout process to complete the purchase. After that the user should be returned to that page with a congratulations message.
Volusion Integration

In this guide we will be integrating WeGetFinancing as an alternate payment method for Volusion. This means that besides your current payment methods you will have WeGetFinancing as a payment method in the checkout page.
The way this process works is by adding a Javascript to the checkout page, that redirects to our form when the payment method name is detected. Make sure to test it, since heavily modified templates or newer versions of Volusion could break this process.
For doubts do not hesitate to contact support@wegetfinancing.com.
Step by Step
Login onto your Volusion Merchant Admin Account.
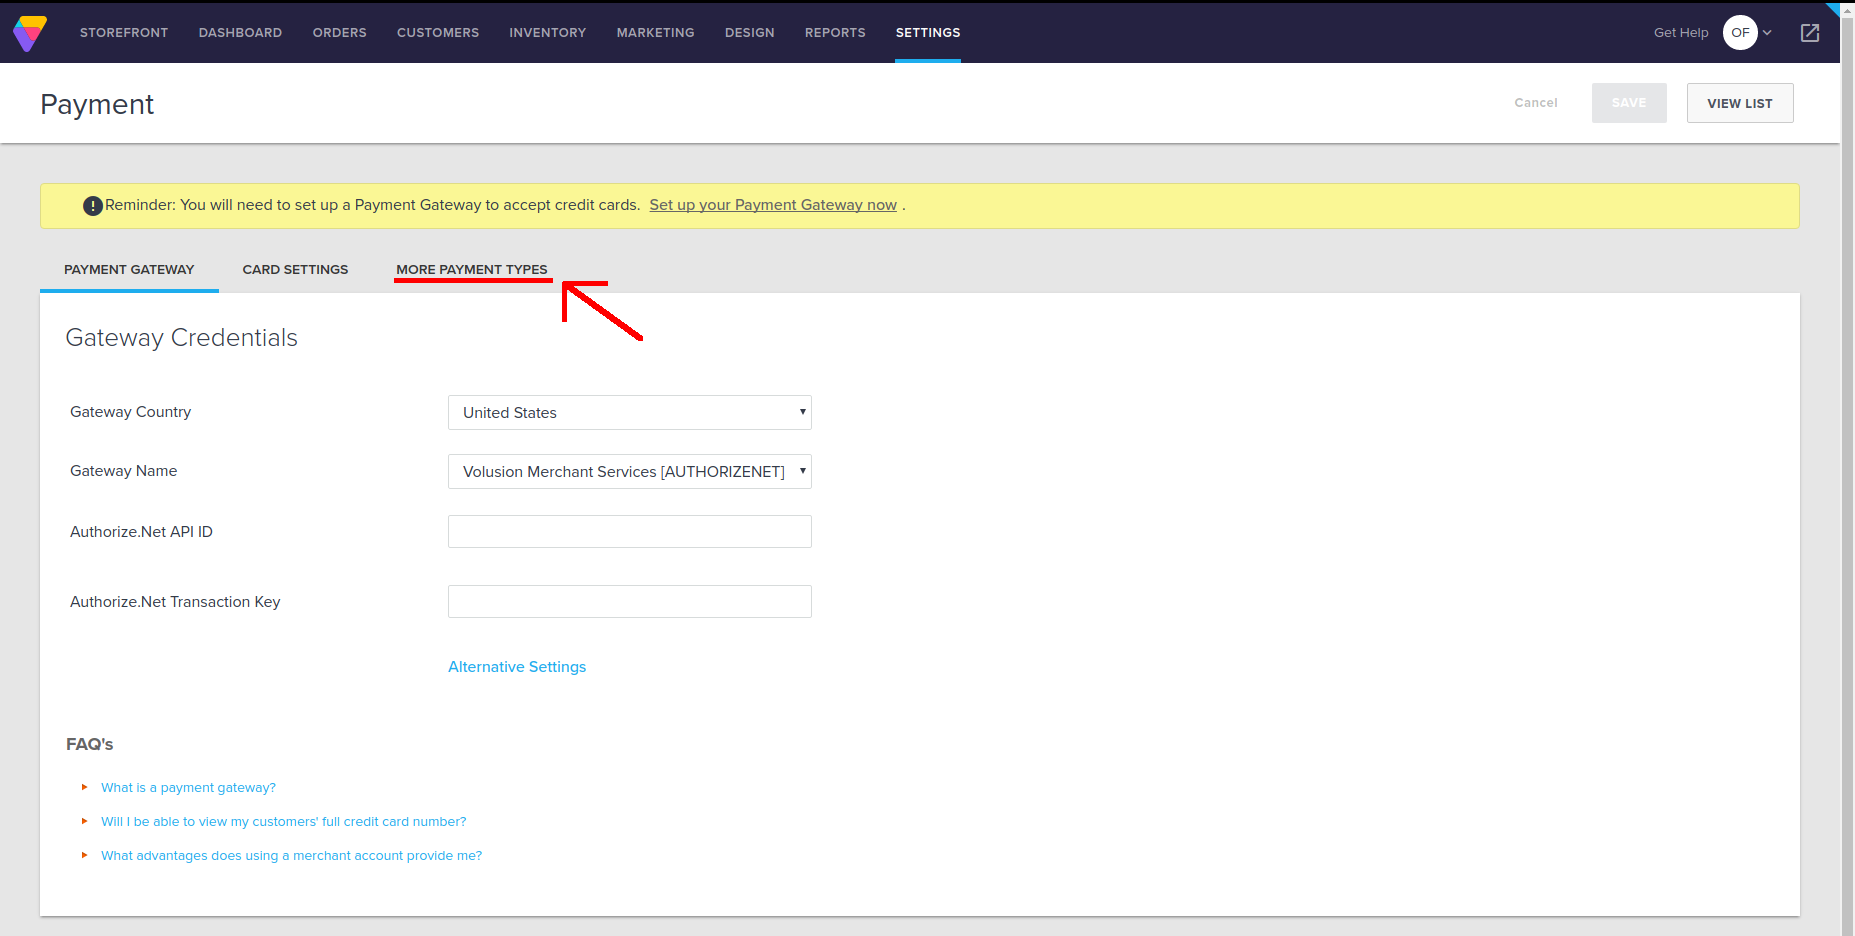
Navigate to: Settings / Payment
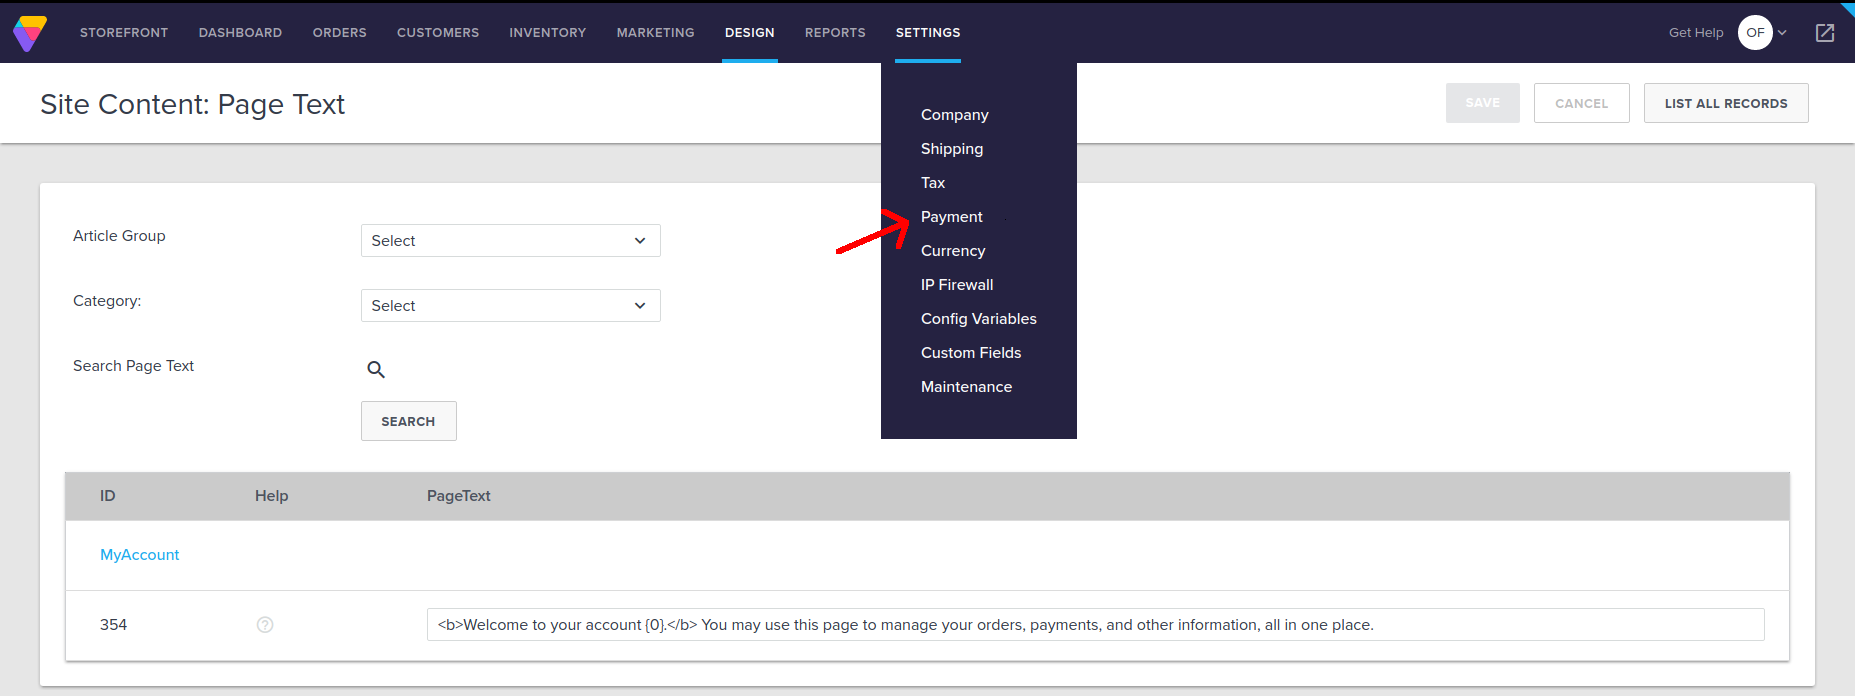
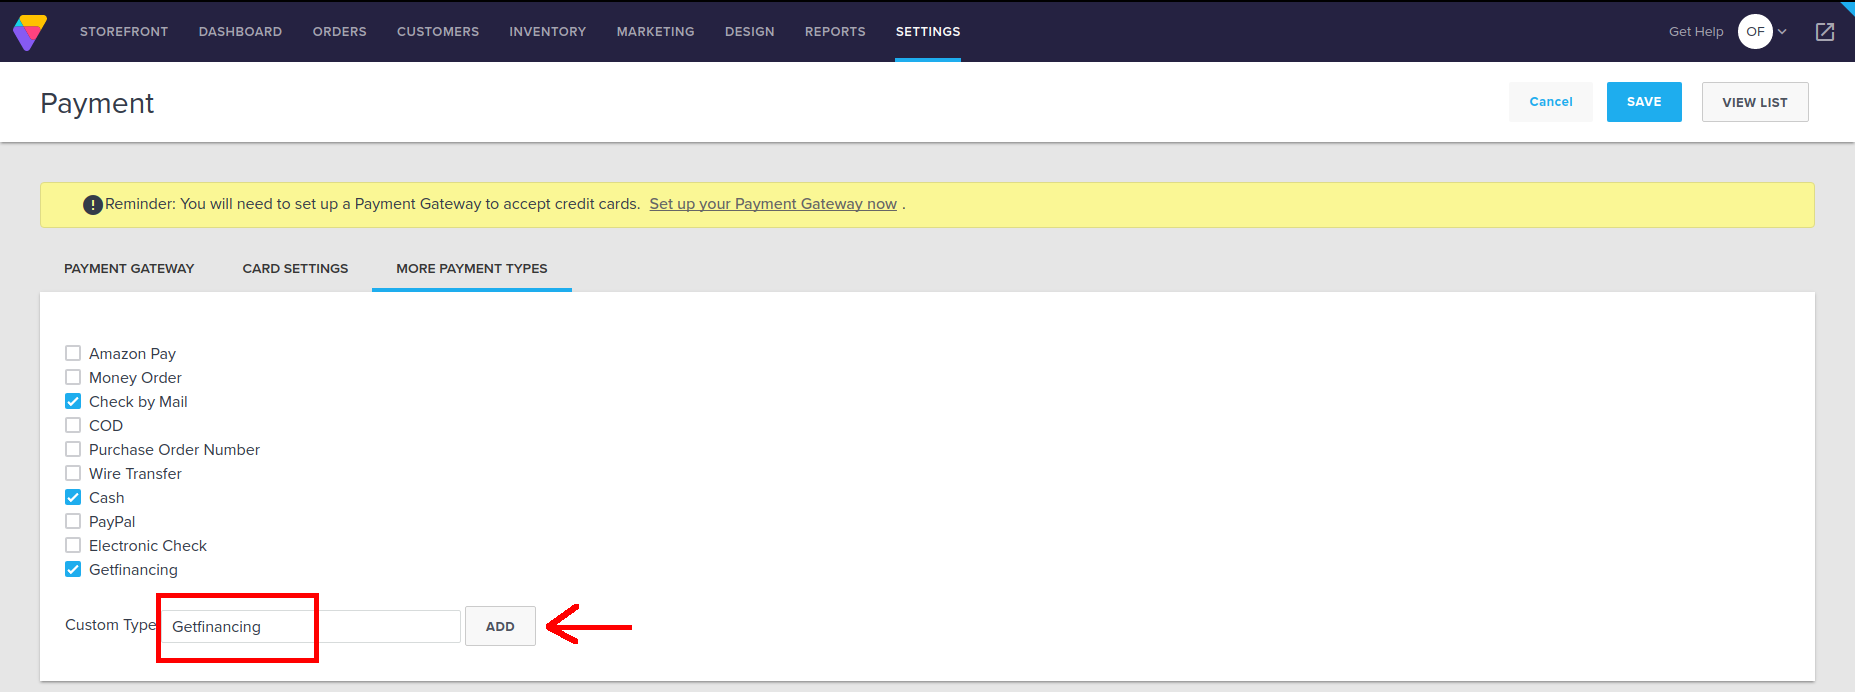
Go to: More Payment Types and add a new Custom Type method called “WeGetFinancing”
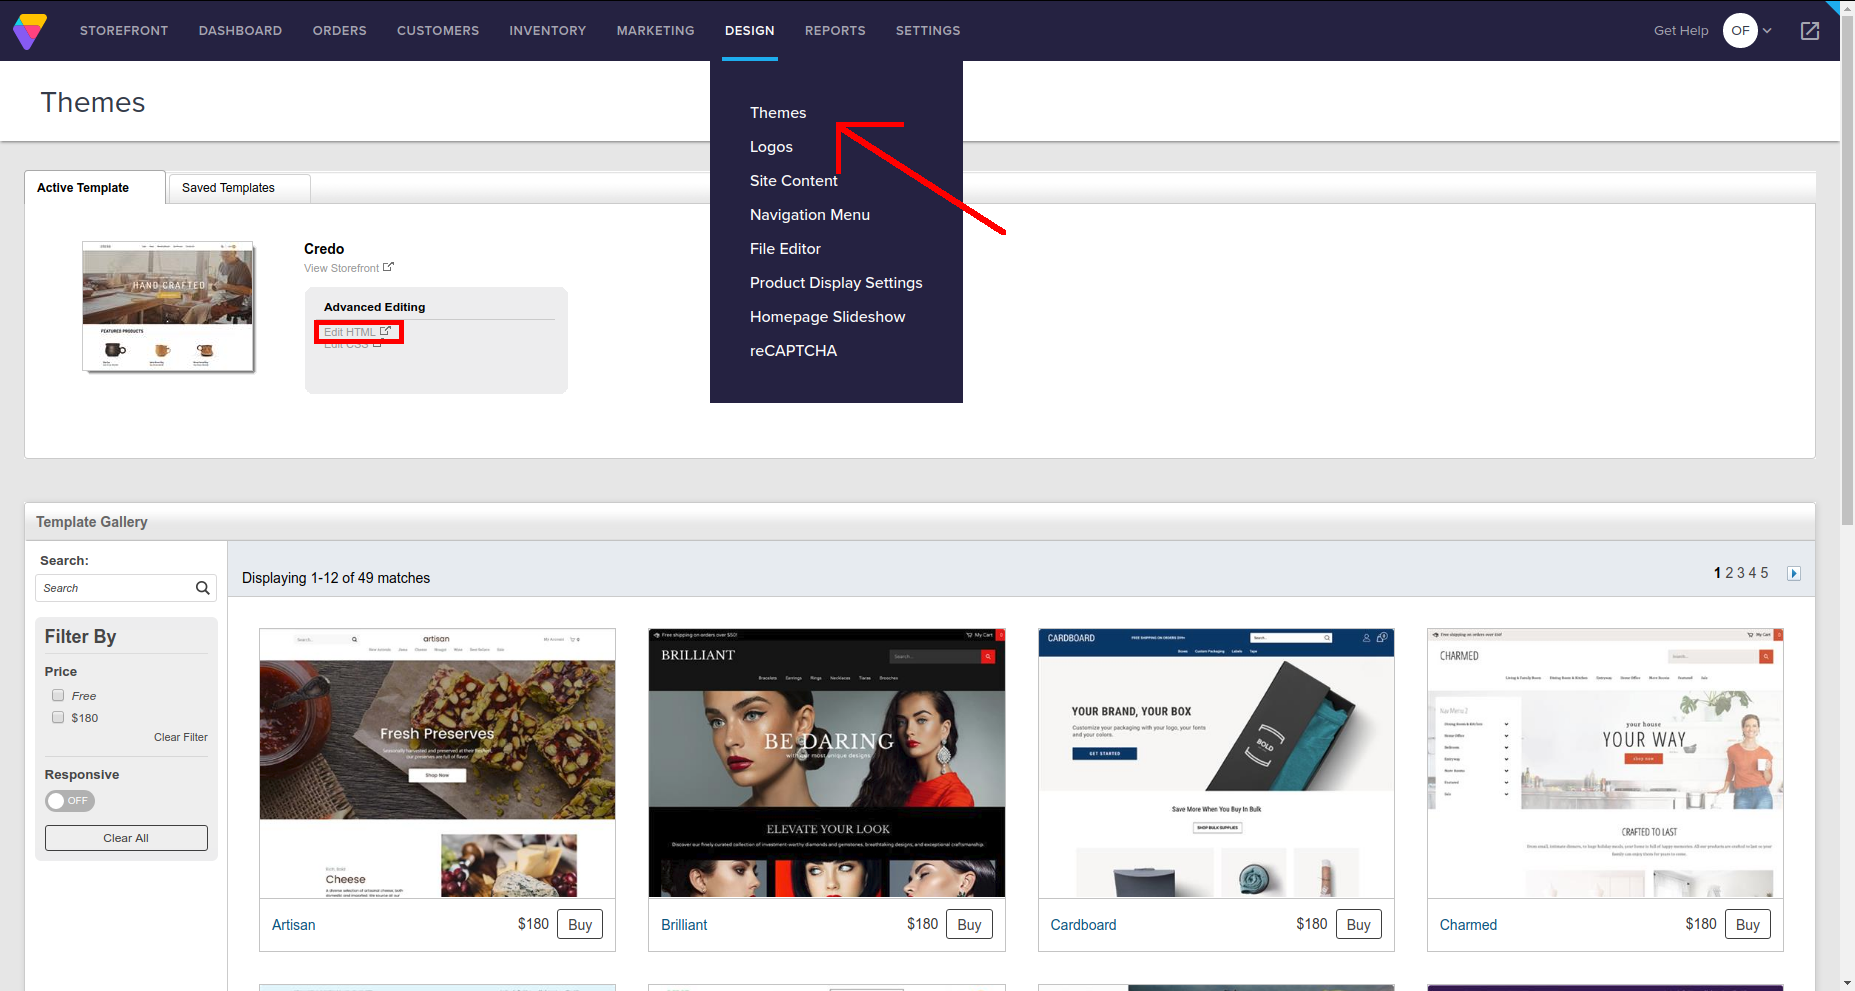
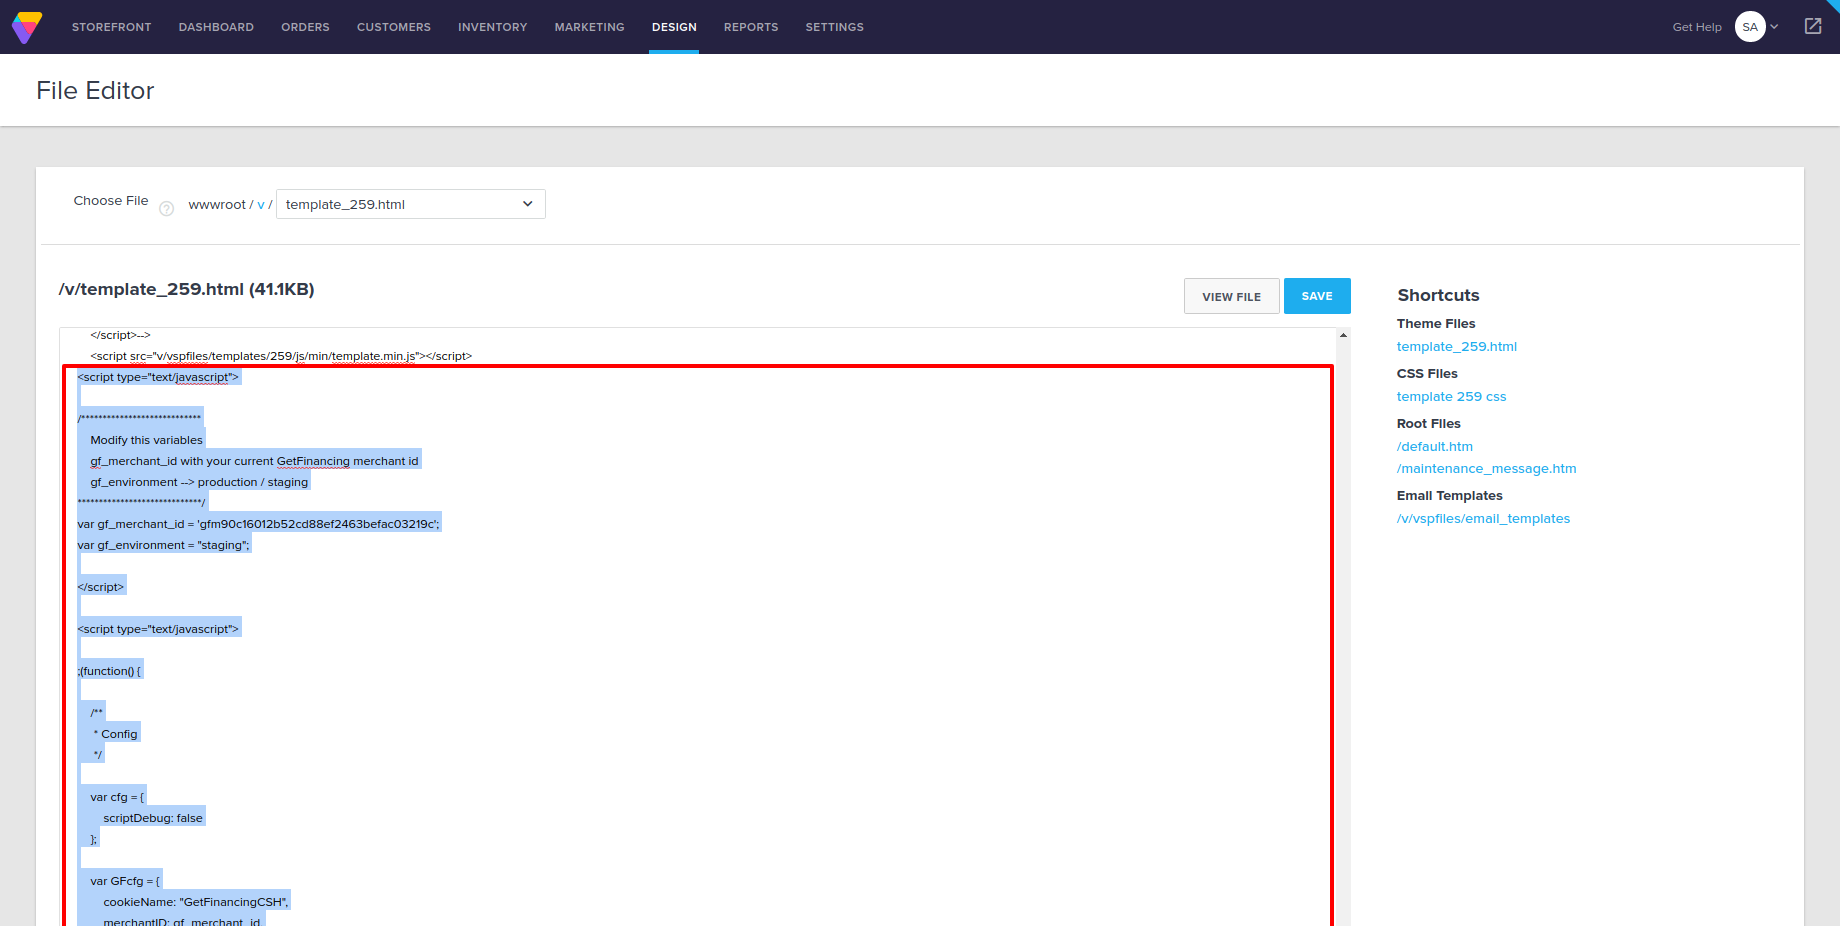
Navigate to: ** Design / Template ** and Edit your Active Template clicking on “Edit HTML”
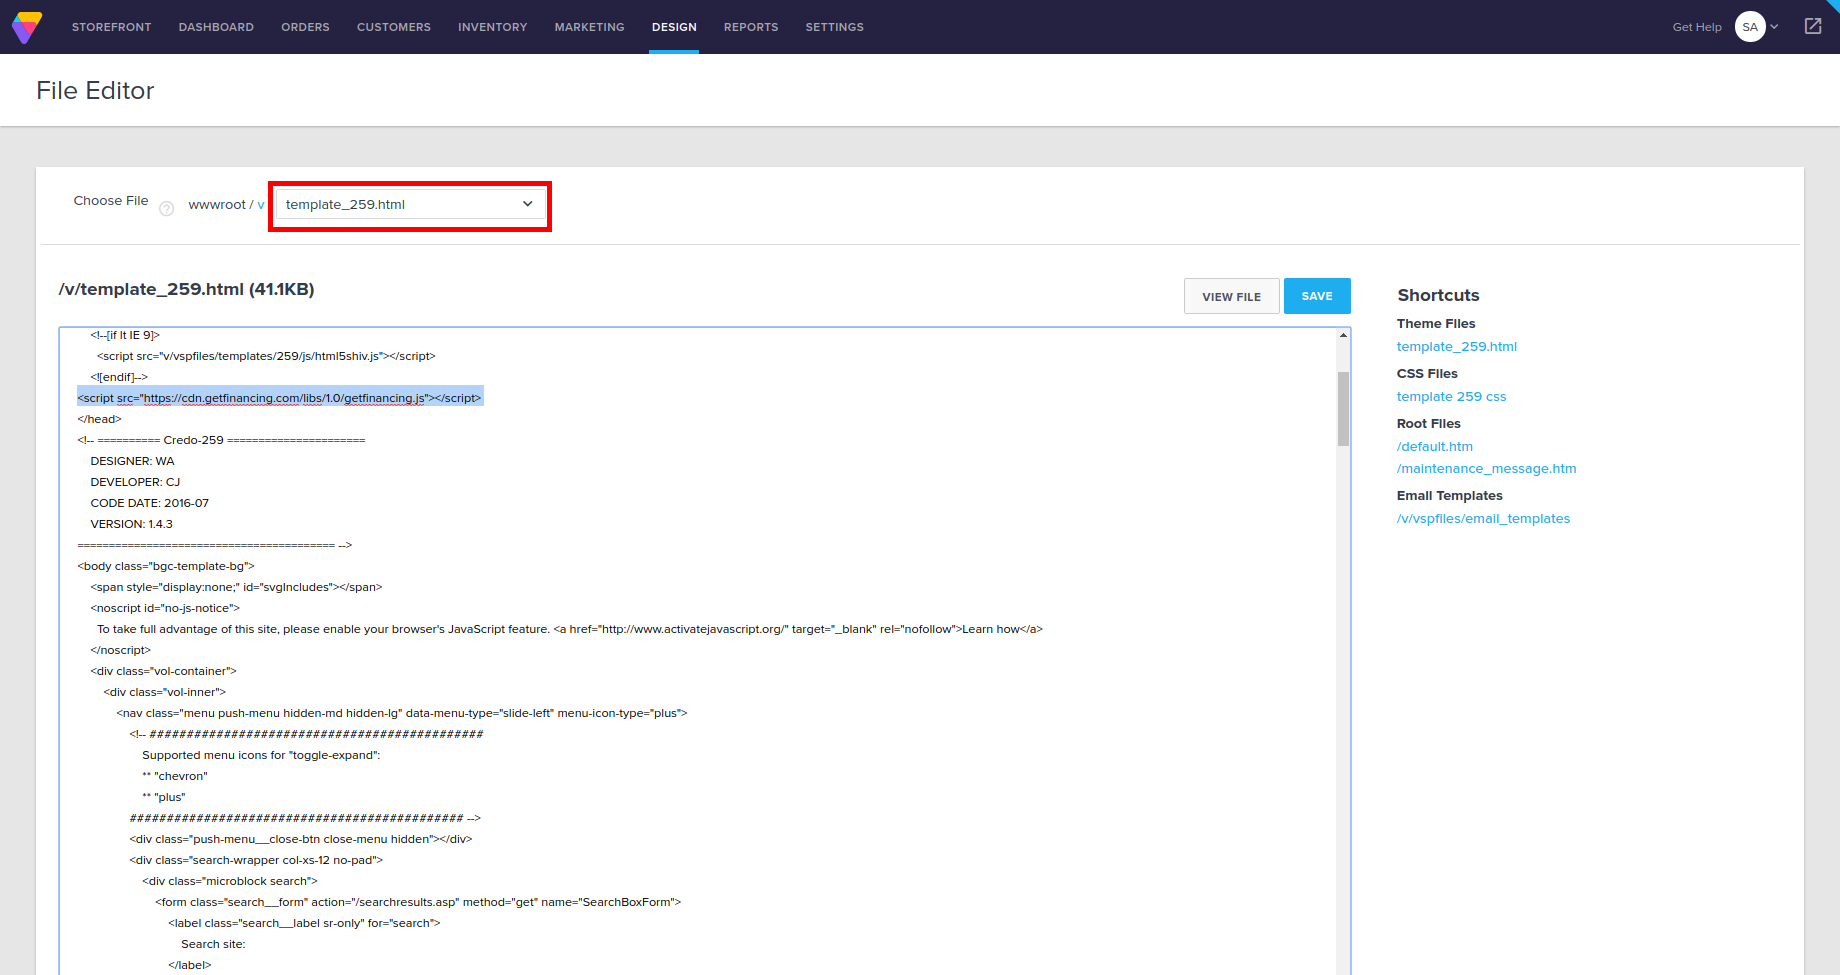
In the dropdown, search the main template file to edit.
Insert this piece of code before </head> tag as shown in the image:
<script src="https://cdn.wegetfinancing.com/libs/1.0/wegetfinancing.js"></script>
Next, copy/paste this piece of Javascript code before </body> tag and save the changes
Remember to change [YOUR_MERCHANT_ID]
Environment variable should be “production” or “staging” depending whether you are integrating in a production environment or not.
<script src="https://cdn.wegetfinancing.com/libs/1.0/wegetfinancing-plugin.js"></script>
<script type="text/javascript">
    /* Insert Here your merchant ID */
    var merchant_id = 0;

    /* Insert Here the Environment */
    var environment = "production"  // "staging" otherwise

    /* PluginOptions */
    var pluginOptions = {
      disableFaqLink: false //if true, disables the WeGetFinancing logo placement into the cart page
    }

    (new getFinancingPlugin.VolusionPlugin(merchant_id, environment, {}, pluginOptions)).start();

</script>
Finally save the changes and make sure to test it with a sample purchase.
You will see WeGetFinancing as a payment method in the checkout screen.
If everything goes correctly, you will be redirected to our checkout process to complete the purchase. After that the user should be returned to that page with a congratulations message.
Managed shopping cart plugins
Shopify Official Payment Method

In this guide we will be integrating WeGetFinancing as an alternate payment method for Shopify. This means that besides your current payment methods you will have WeGetFinancing as a payment method in the checkout page.
For doubts do not hesitate to contact support@wegetfinancing.com.
Step by Step
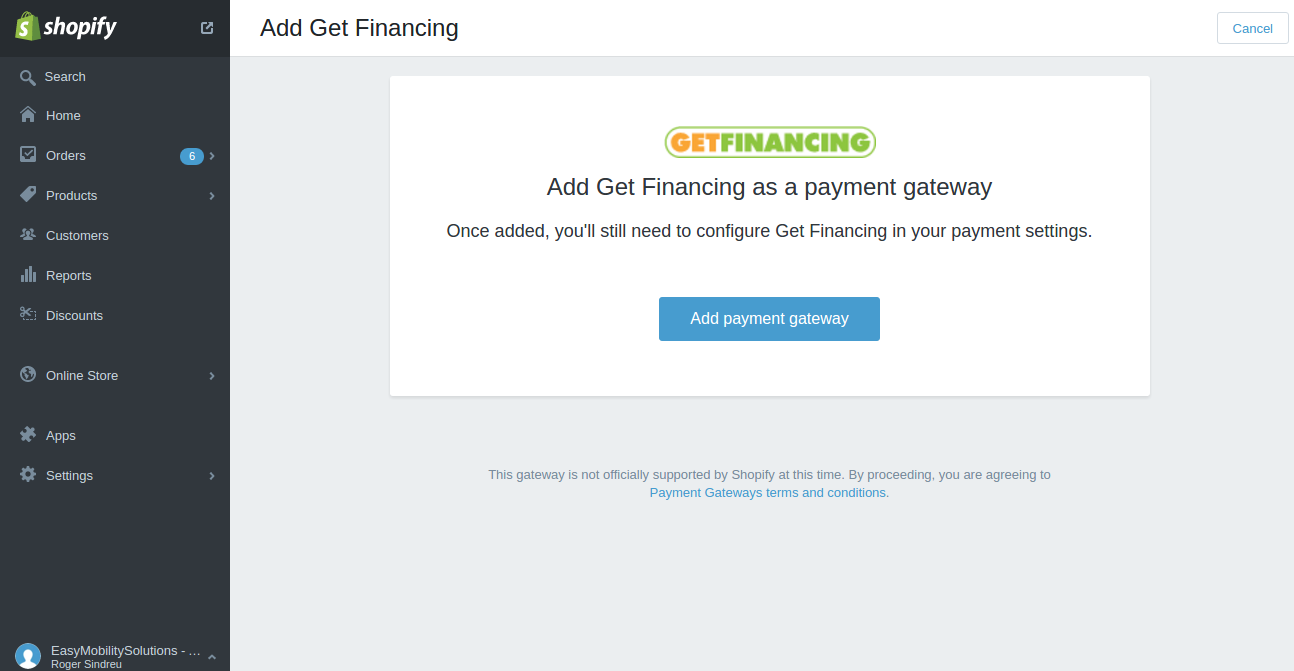
Open this url:
https://www.shopify.com/login?redirect=authorize_gateway%2F1030330
(Enter your Shopify credentials if you are not logged in)
After this, the following screen will appear, where you have to click “Add payment gateway”:
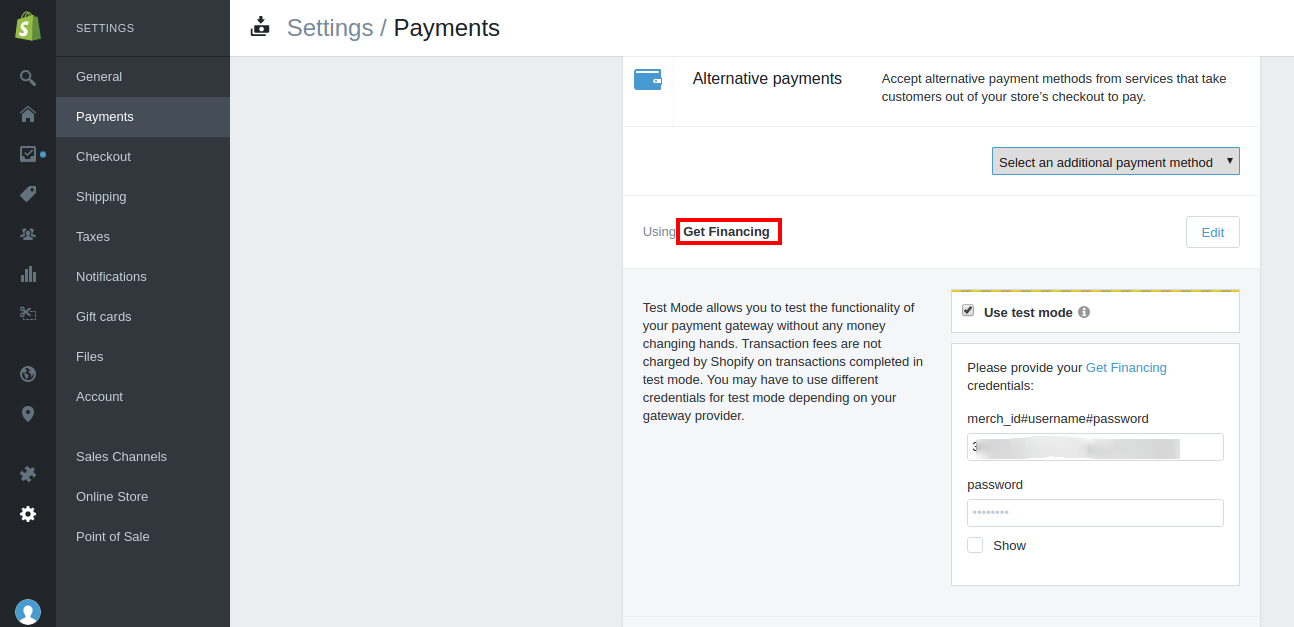
And then under Settings-> Payments -> Alternative Payments there will be a place to add your merchant_id, username and password. Notice you need to add them in a single location separated by # (i.e. merch_id#user#pass):
Also notice you will need to enter again the password in the field below.
* 4) Add https://cart.wegetfinancing.com/s/callback.php (the same url for all Shopify users) as postback url in our portal for both testing and production environments. Otherwise the order will not appear on your Shopify when the customer completes its order on WeGetFinancing:

After saving WeGetFinancing should be available to be used:
Finally make sure to test it with a sample purchase.
Open-source shopping carts
CS-Cart Plugin
The following plugin was designed for CS-Cart:
Download wegetfinancing-cs-cart
See our GitHub page for this module
DrupalCommerce Plugin

The following plugin was designed and tested with DrupalCommerce 2.x and Drupal 7.x
Download wegetfinancing-drupalcommerce-latest
See our GitHub page for this module
Joomla Virtuemart Plugin
The following plugin was designed and tested with VirtueMart 3 and Joomla 2.5 - 3.x.
Download wegetfinancing-virtuemart-latest
See our GitHub page for this module
Magento 1.X Plugin

We recommend you to install our Magento Plugin.
Download magento-wegetfinancing-latest
See our GitHub page for this module
The latest versions of the plugin can be installed completely visually from the Magento Connect area. Just open the file from there and follow the normal steps.
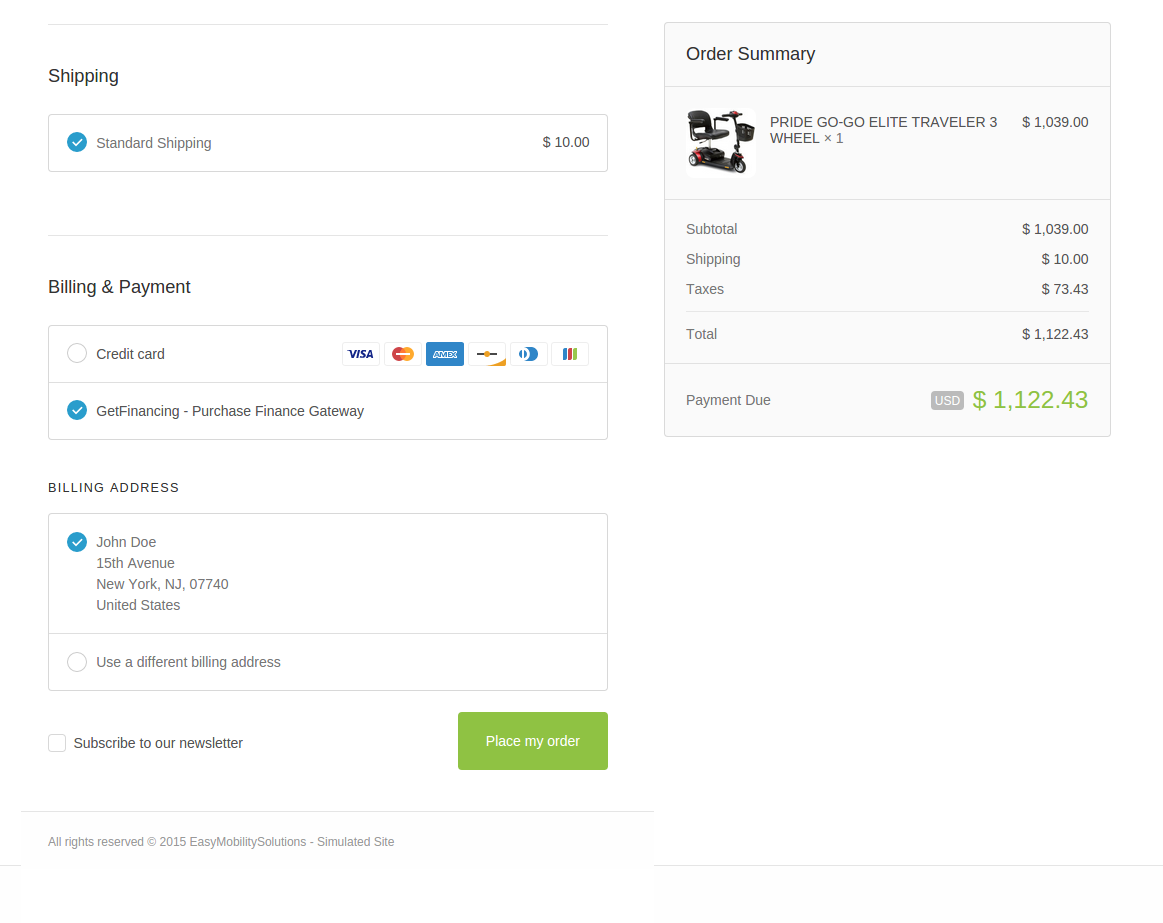
The plugin will add WeGetFinancing in your checkout process, like in the following example:
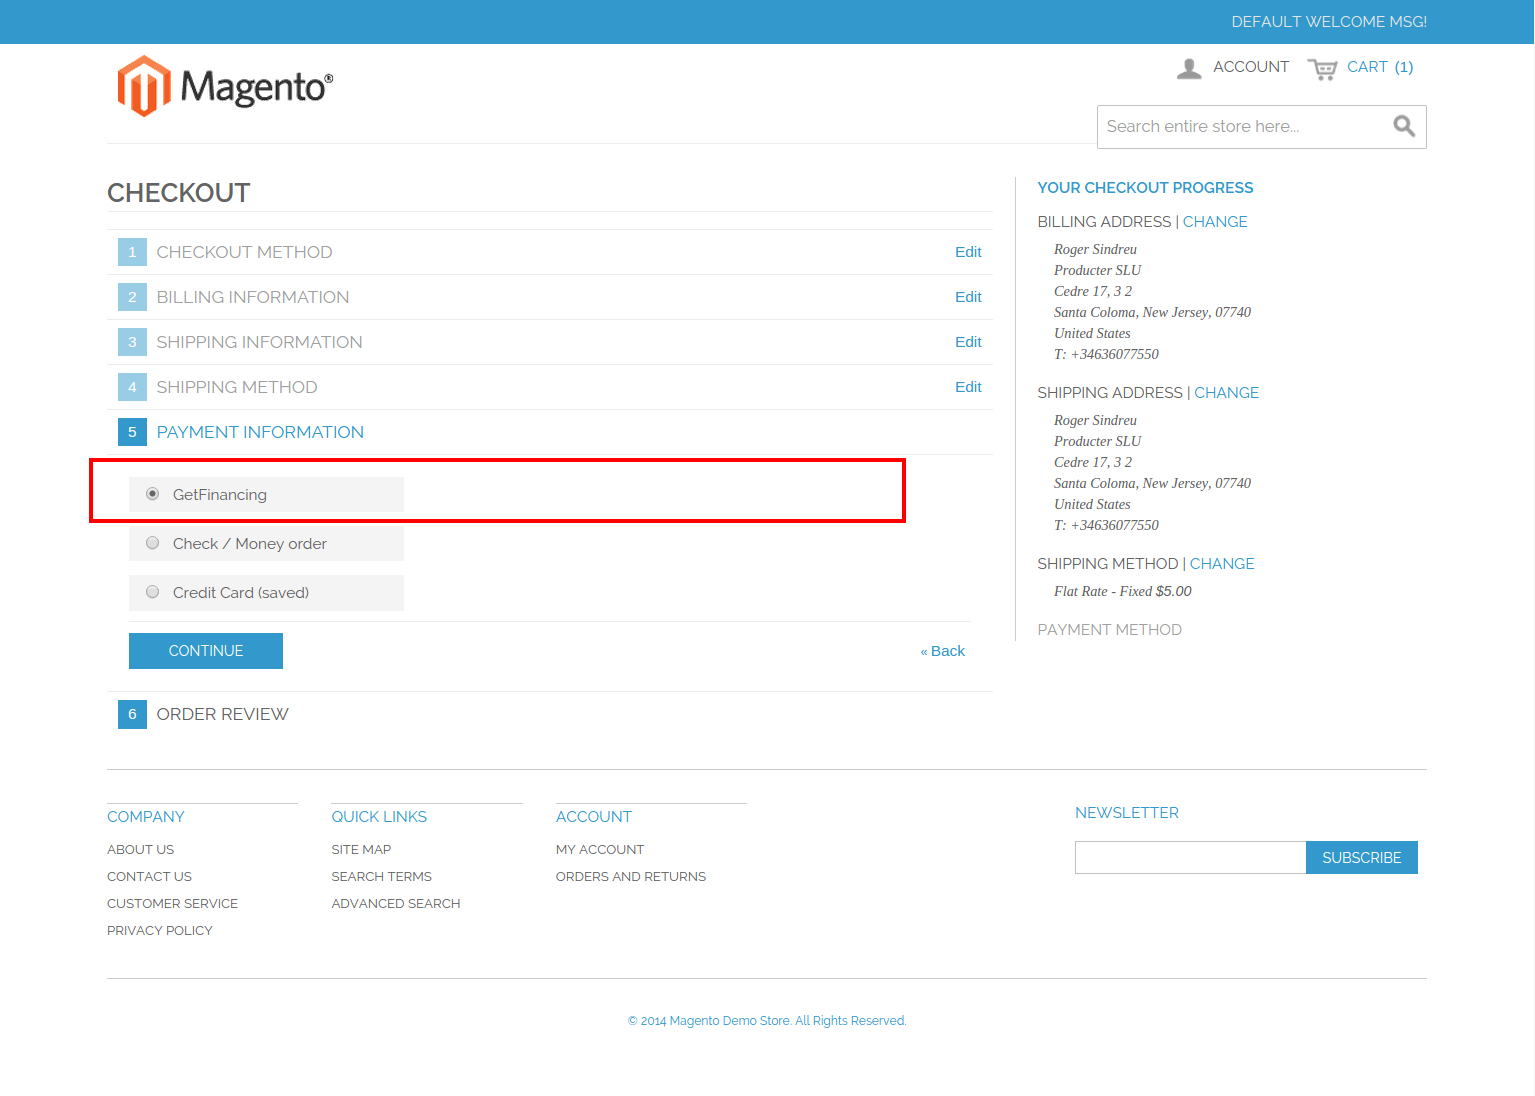
Once they select WeGetFinancing as a purchase the process will begin:
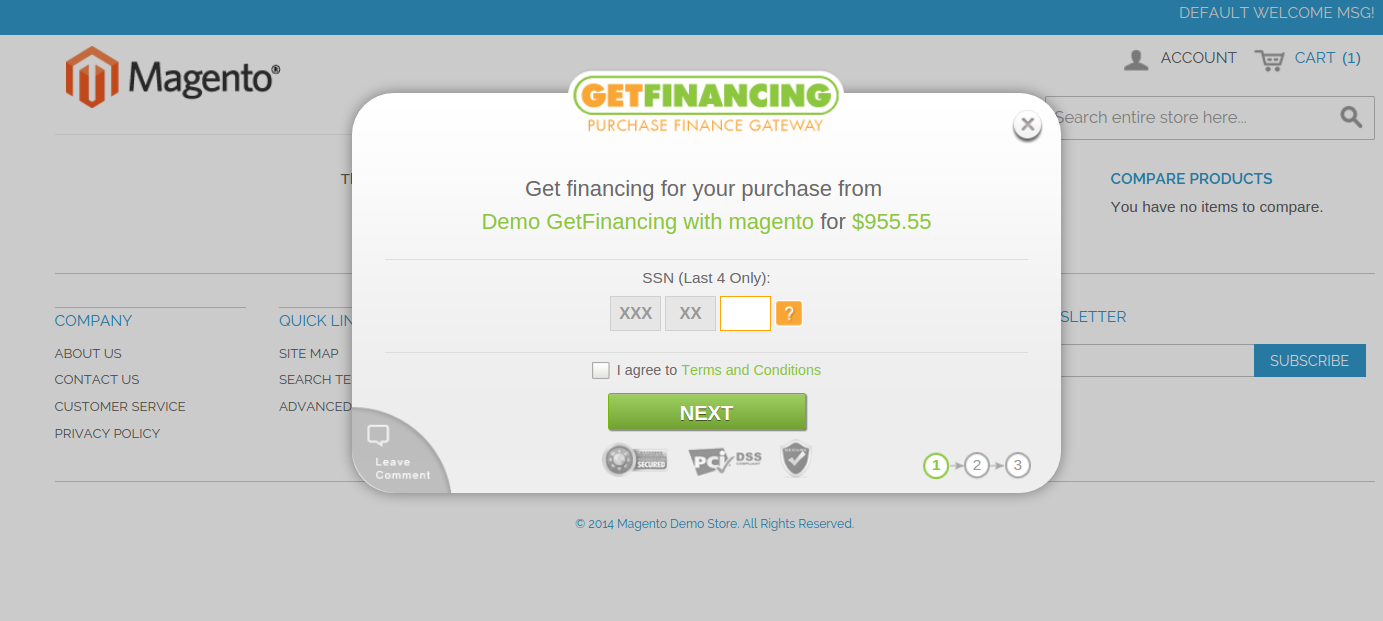
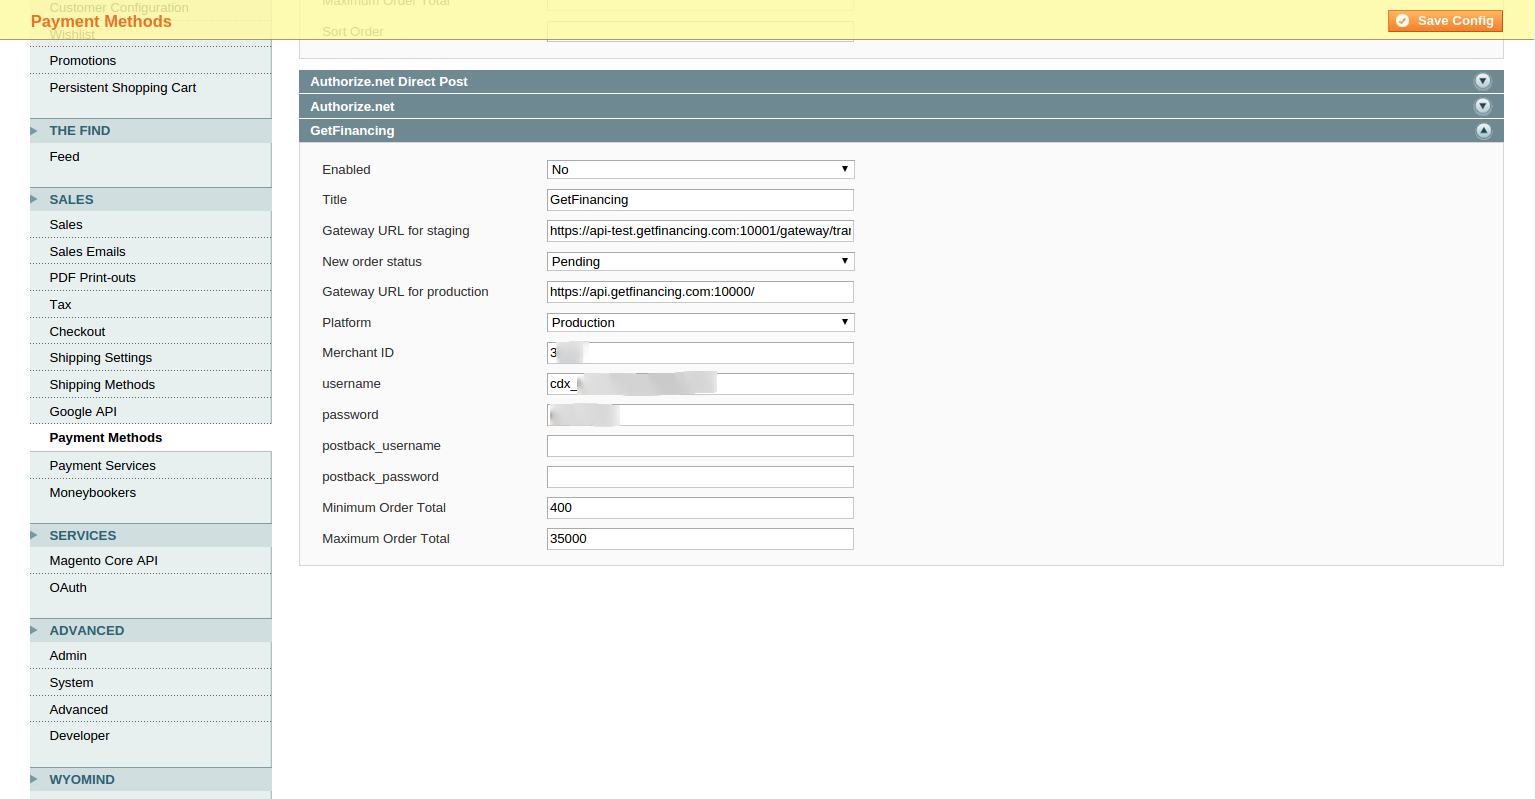
You will be able to specify your configuration parameters using the configuration area in your admin backoffice:
We recommend that you add some banners and agreement description in your page besides this plugin to let the users know that they have the option of WeGetFinancing for their purchase.
Remember after installing the plugin to add the postback url on your WeGetFinancing portal. The url for the default magento module is {your_domain}/wegetfinancing/standard/postback i.e. http://www.yourdomain.com/wegetfinancing/standard/postback
Also notice that if you are using a highly modified template it could need some extra tunning.
Make sure to read the README file inside the plugin.
Magento 2.X Plugin

We recommend you to install our Magento 2.X Plugin.
Download magento2-wegetfinancing-latest.zip
See our GitHub page for this module
OpenCart Plugin

We recommend you to install our OpenCart Plugin, which has versions for OpenCart 1.5.X and 2.0.X.
Download opencart-wegetfinancing-latest
See our GitHub page for this module
Installation:
Purchase demo:
Oscommerce Plugin

The following plugin was designed with Oscommerce 2.3:
Download oscommerce-wegetfinancing-latest
See our GitHub page for this module
Prestashop Plugin
The following plugin was designed for Prestashop 1.5 and 1.6:
Download prestashop-wegetfinancing-latest
See our GitHub page for this module
WooCommerce (Wordpress) Plugin

We recommend you to install our WooCommerce Plugin.
Download woocommerce-wegetfinancing-latest
See our GitHub page for this module
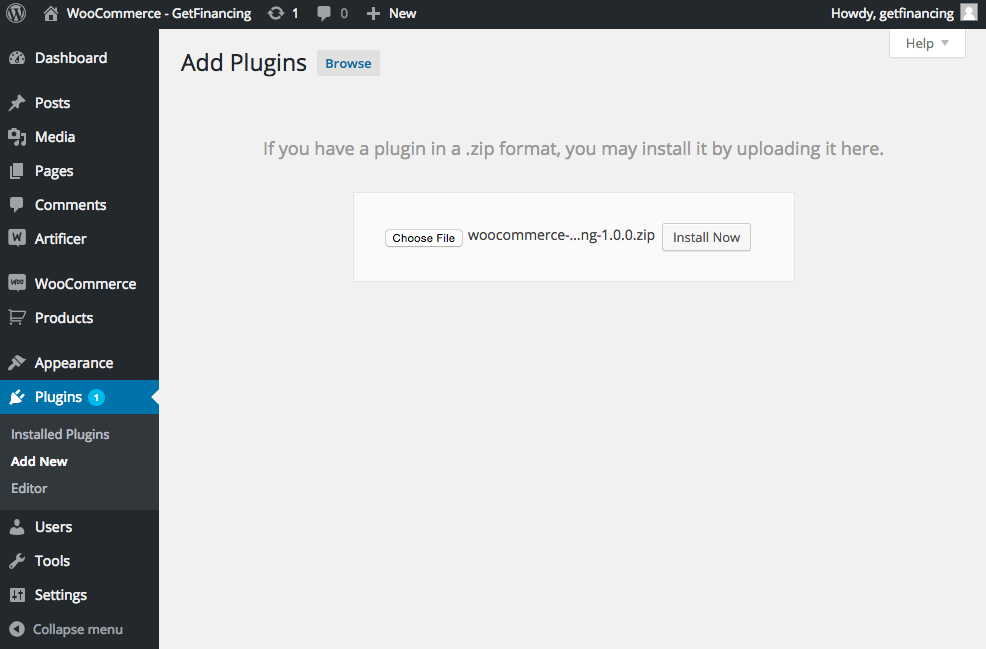
To install the plugin into your WooCommerce store go to your Wordpress Backoffice: Plugins / Add New / Upload Plugin
Browse the file you downloaded before and click Install Now.
The plugin will add WeGetFinancing in your checkout process, like in the following example:
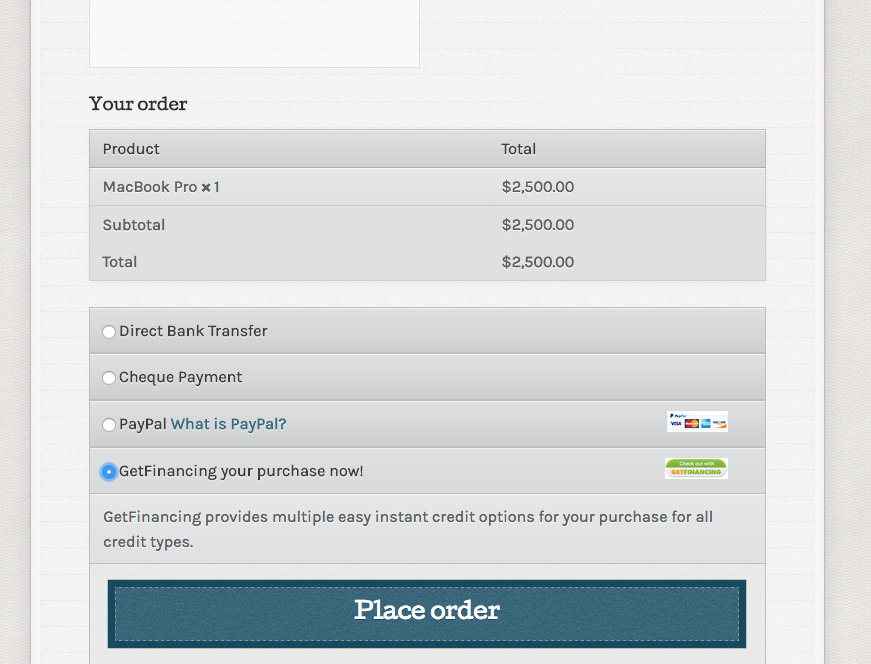
Once they select WeGetFinancing as a purchase the process will begin:
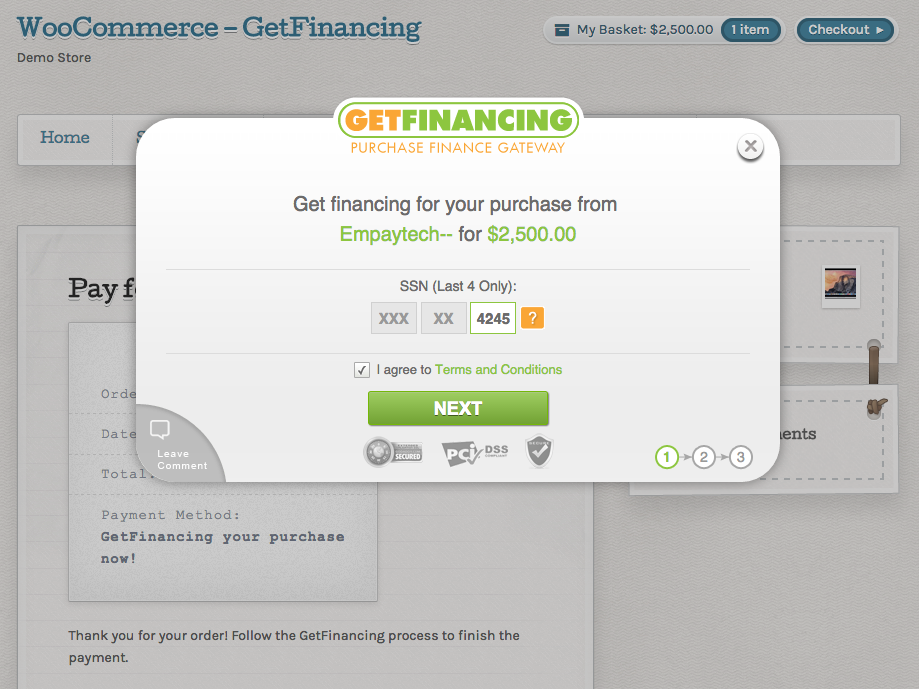
You will be able to specify your configuration parameters using the configuration area in your admin backoffice:
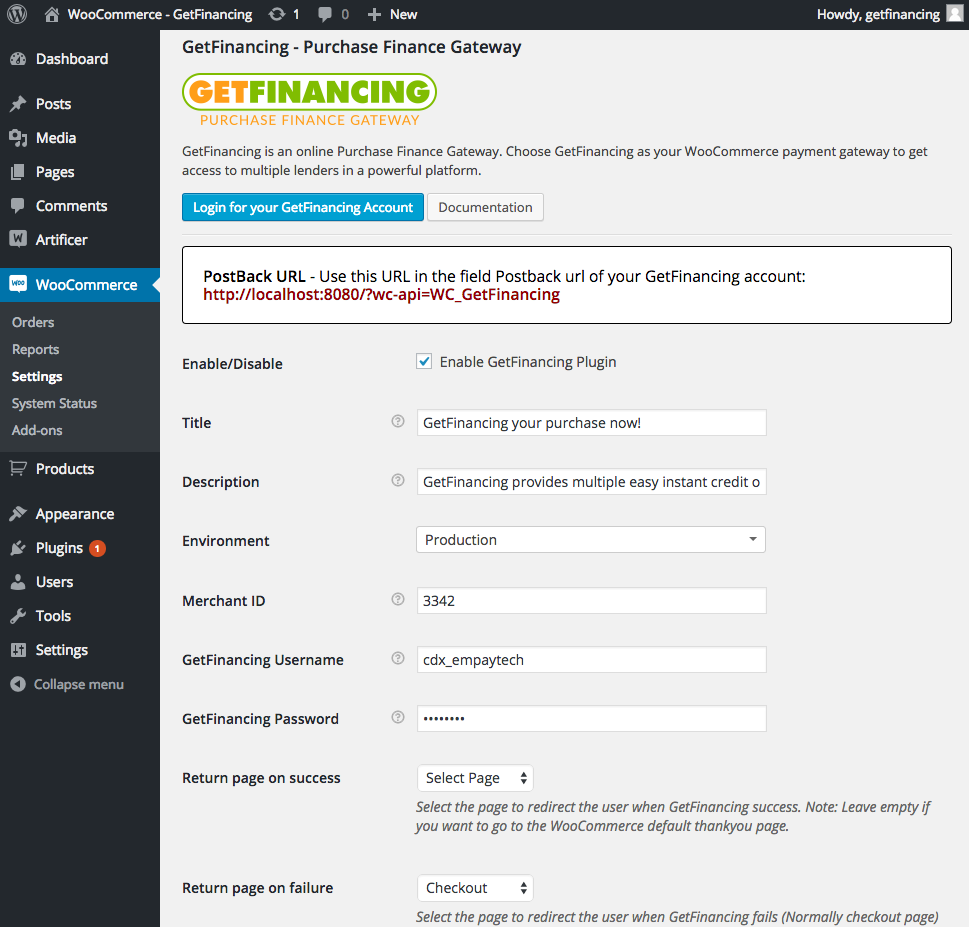
We recommend that you add some banners and agreement description in your page besides this plugin to let the users know that they have the option of WeGetFinancing for their purchase.
Make sure to read the README file inside the plugin and to ask your provider to open outgoing ports 10000 and 10001 for your server (these are used by the WeGetFinancing plugin).
X-Cart Plugin
The following plugin was designed for X-Cart:
Download wegetfinancing-x-cart
See our GitHub page for this module
ZenCart Plugin

We recommend you to install our ZenCart Plugin.
Download zencart-wegetfinancing
See our GitHub page for this module
To install the plugin into your ZenCart store:
Extract zencart-wegetfinancing-x.x.x.zip and copy the contents into Root folder of your ZenCart installation.
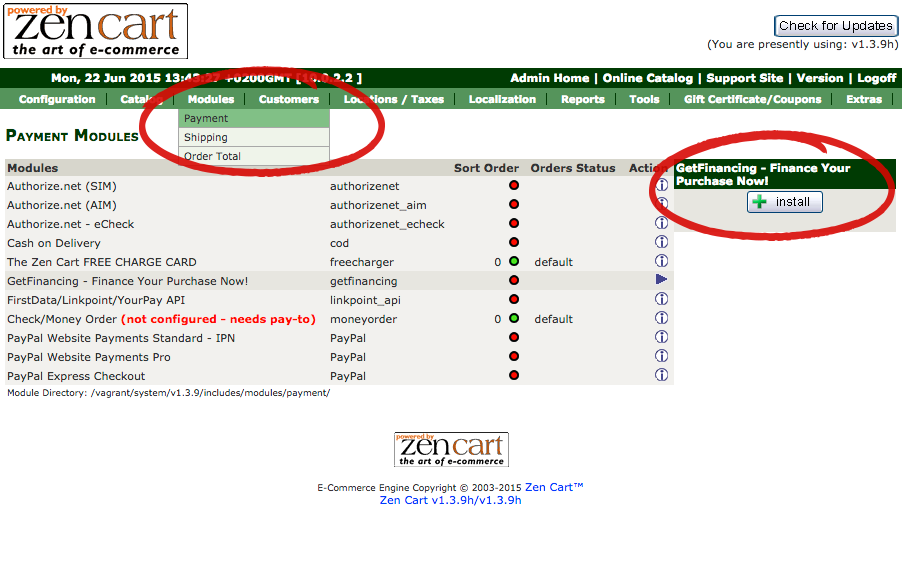
Access to your ZenCart Backoffice and go to: MODULES / PAYMENT
Select the WeGetFinancing Payment Module and press the +Install button.
You will be able to specify your configuration parameters using the configuration area in your admin backoffice:
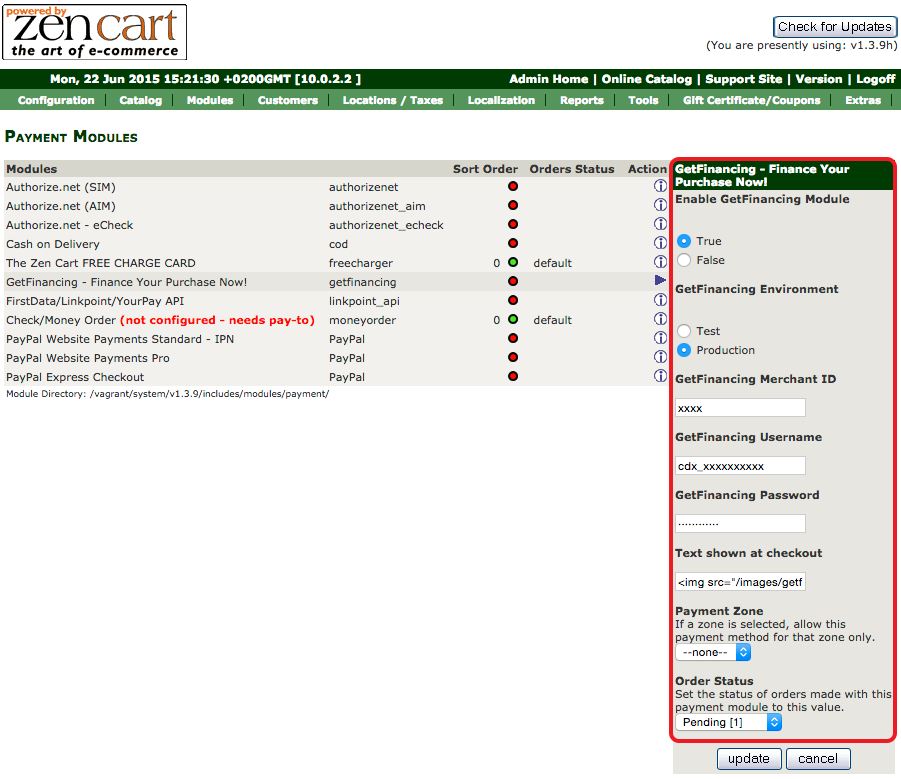
Finally, save the changes.
Automatically you will be able to see the WeGetFinancing payment method in your Checkout process.
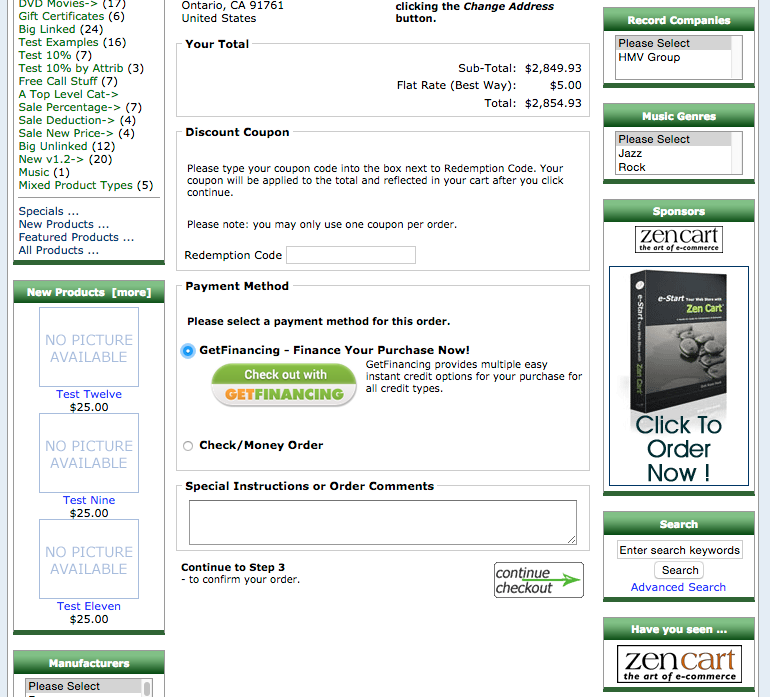
We recommend that you add some banners and agreement description in your page besides this plugin to let the users know that they have the option of WeGetFinancing for their purchase.
Make sure to read the README file inside the plugin and to ask your provider to open outgoing ports 10000 and 10001 for your server (these are used by the WeGetFinancing plugin).
Other shopping carts
We are constantly developing and adding new modules.
Would you like us to add a module for another platform? Do you have a module that can help others integrate?
Please let us know, at integrations@wegetfinancing.com